Application Deployment on Vercel
There are numerous application hosting services available, but we will focus on Next.js applications. As long as the hosting service supports Next.js, it will work. We will use Vercel's application hosting service (opens in a new tab).
Vercel
There are a few steps that should be taken before deploying our application into Vercel.
App development using ROQ BaaS SDK
Before deploying an app to Vercel, you should have an application using ROQ BaaS SDK. Please follow this getting started to create a new application and Next.js quickstart for quick integration with ROQ BaaS SDK. Make sure the application is also saved into a Git repository, such as GitHub, GitLab, or Bitbucket.
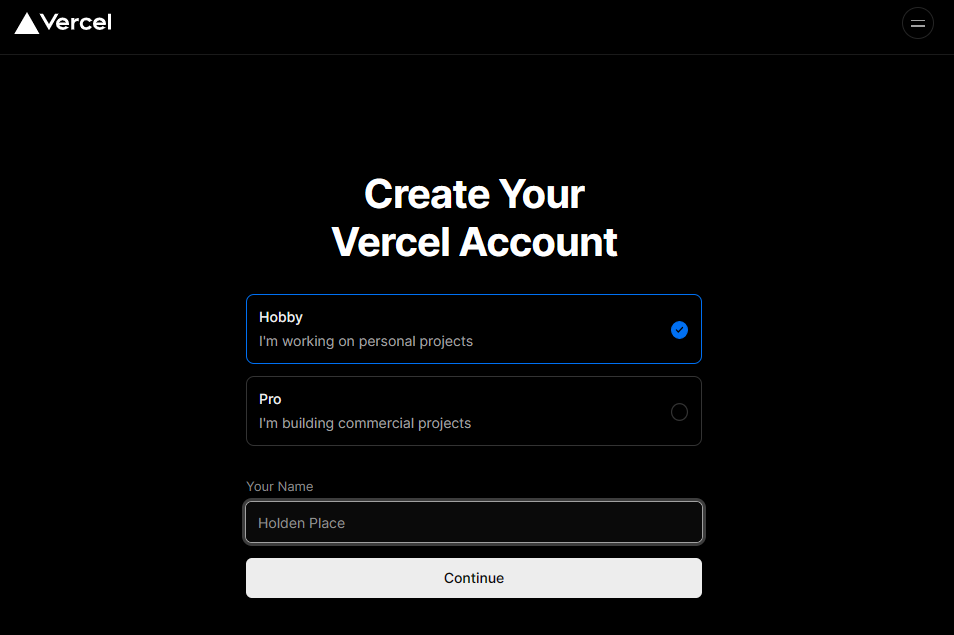
Create a Vercel account
Creating a Vercel account is a straightforward process. Go to https://vercel.com/signup (opens in a new tab) to signup. You can choose Hobby or Pro and name the project whatever you need.
Vercel will try to connect the new account with git providers, or you can use the email instead. You can use any git provider, such as GitHub, GitLab, or Bitbucket, and for this documentation, we will use GitHub.

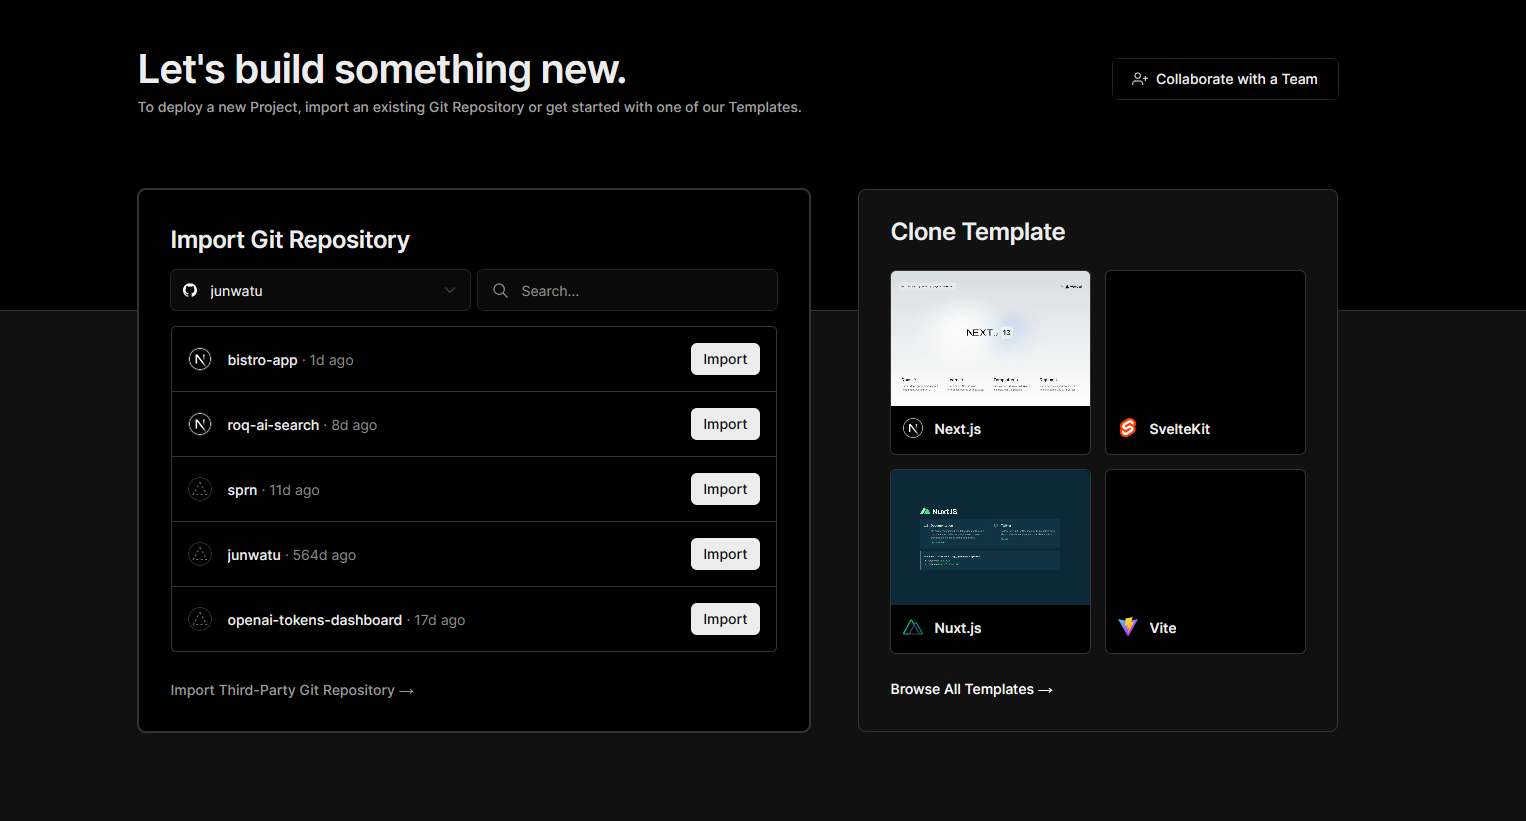
Import A Project
To import a project, click the Add New... → Project. This will bring you to importing a project from GitHub.
Deployment Kickstart
For instance, choose the freelancer-inc project into our Vercel project and import it into Vercel.
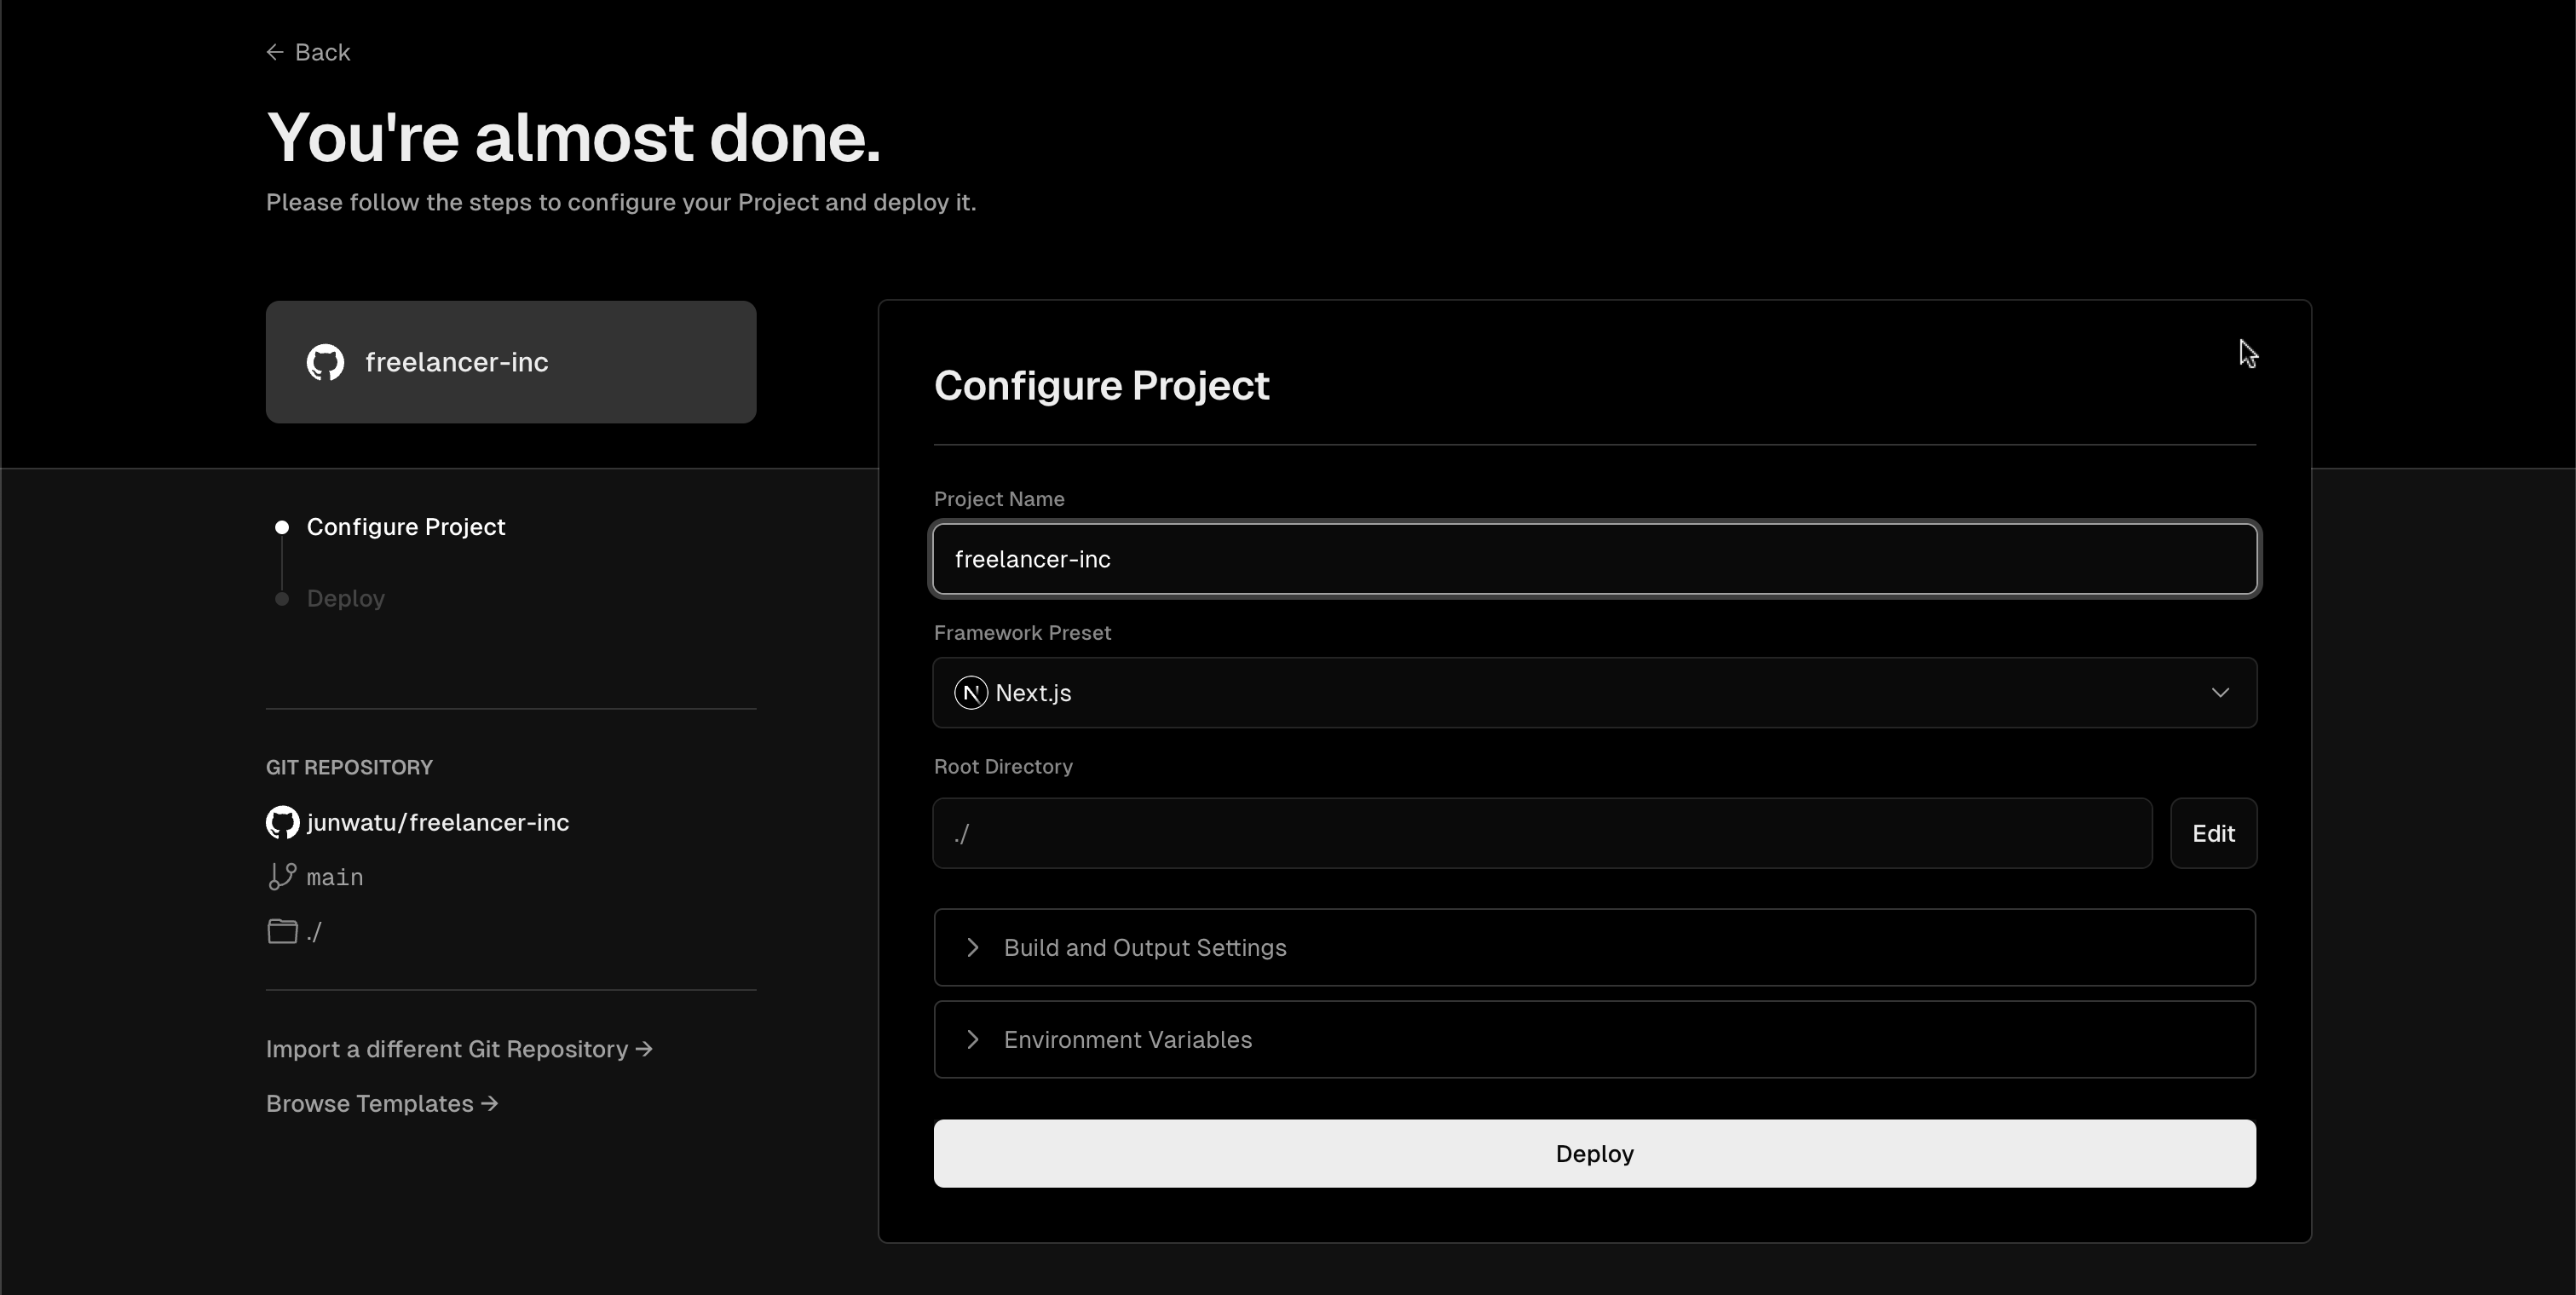
You must deploy the project first to get into the Vercel project settings. We will set up the environment settings later.
The deployment will be an error because we still need to set the environment settings. After this initial build, we will get the project domain name from Vercel, which we will need later for the project environment settings.
Setup Environment Variables
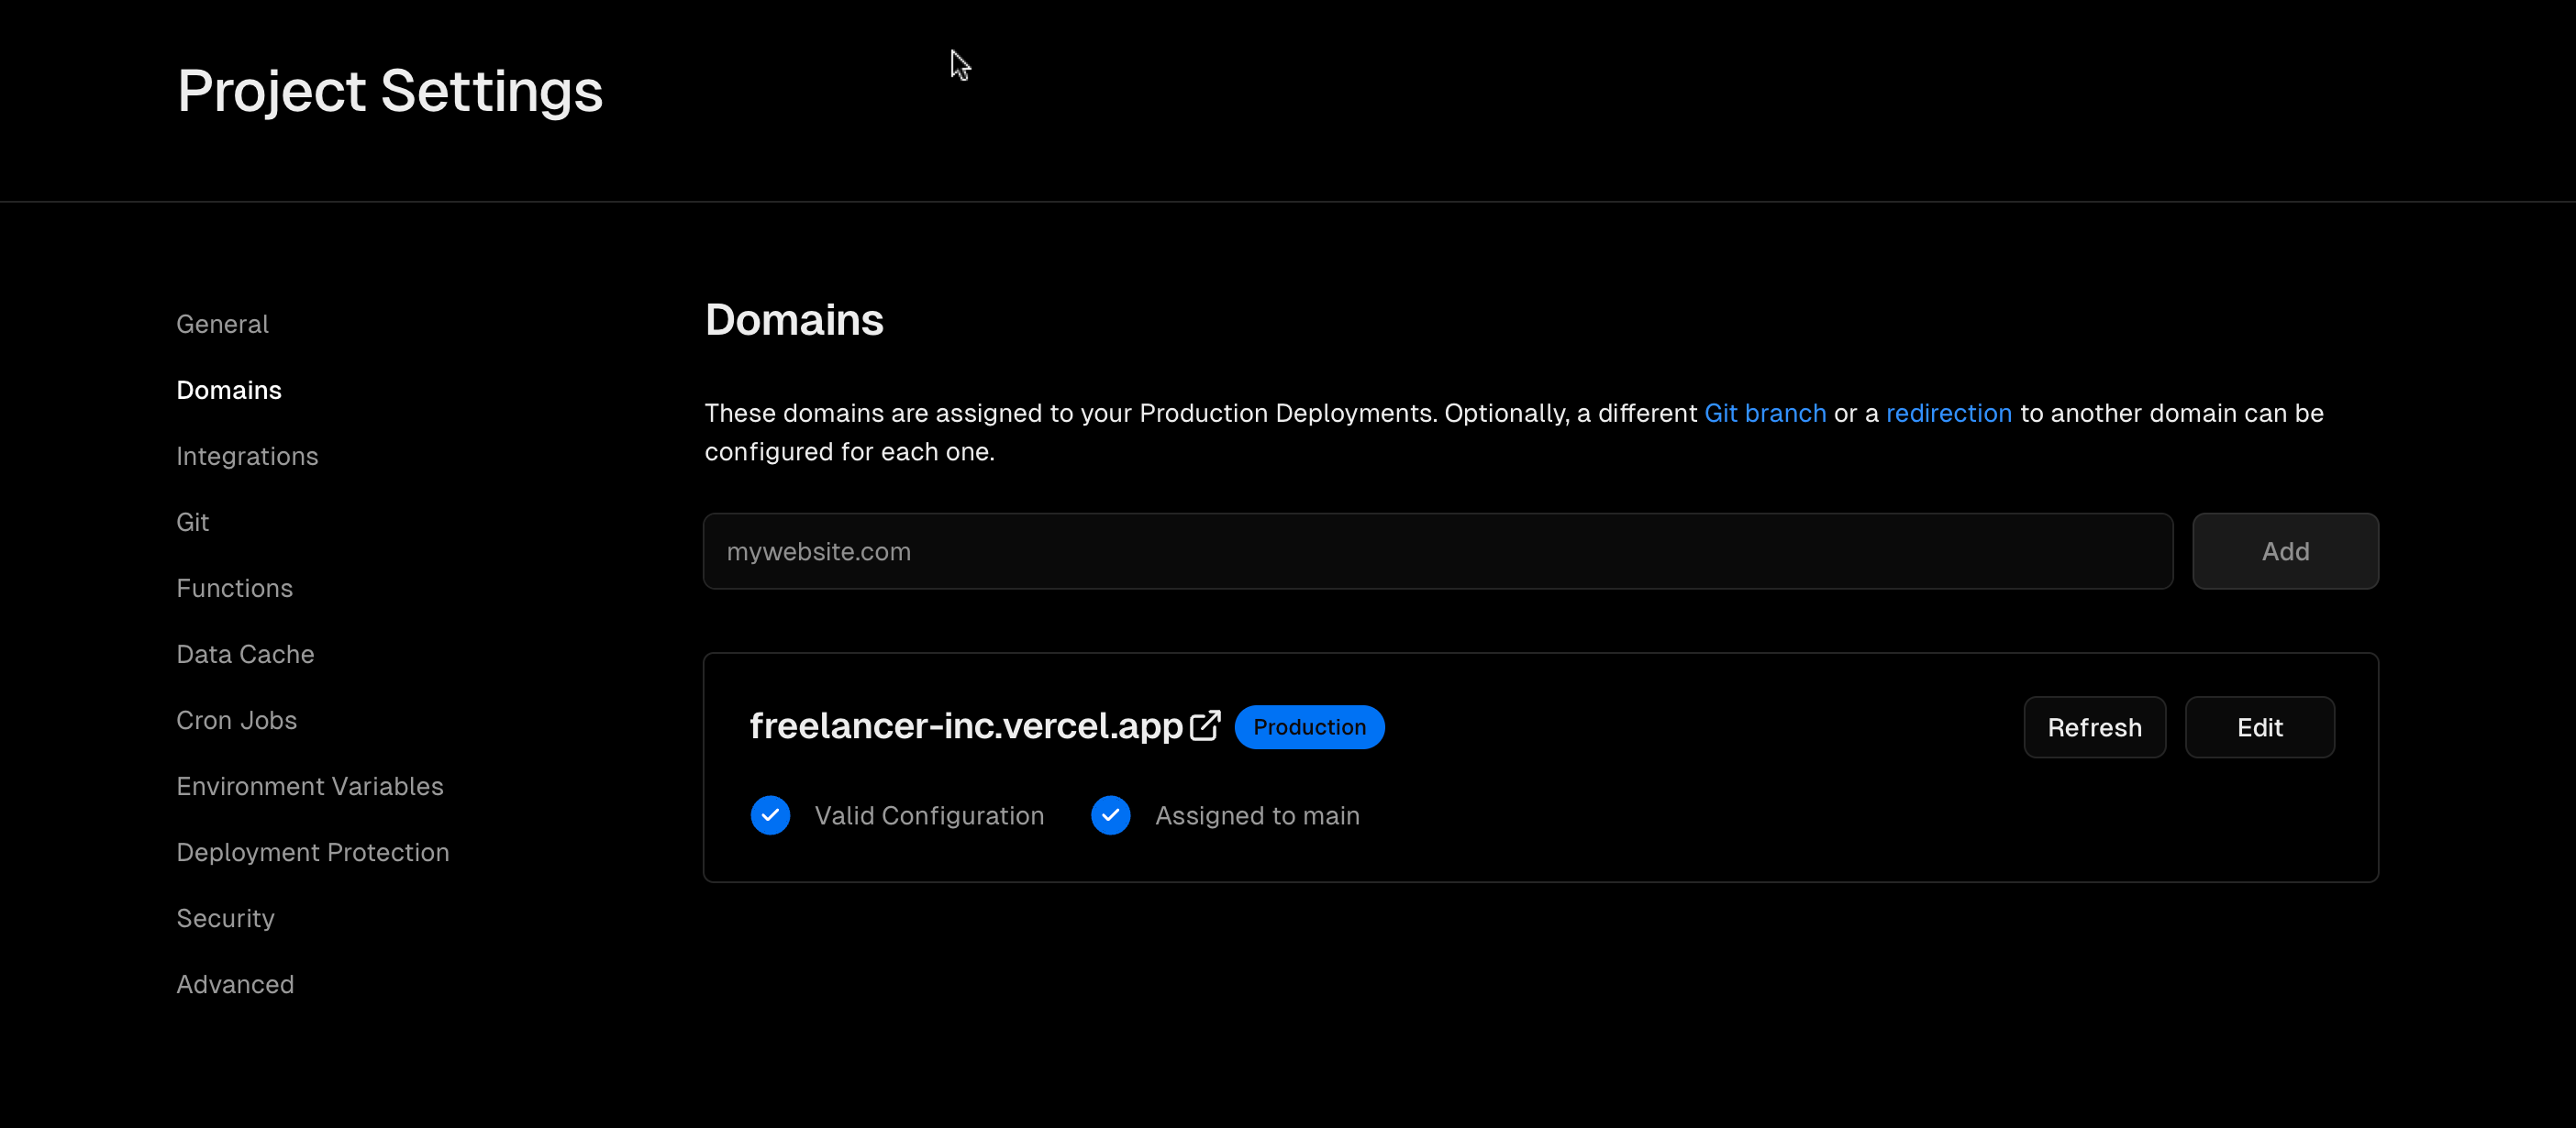
To get the project domain name, go to the Vercel project Settings → Domains. For example, the project domain name is freelancer-inc.vercel.app.
ROQ Console Environments
You need to set this base URL freelancer-inc.vercel.app of the project. Log in to the ROQ Console (opens in a new tab) and go to Domain & URLs. You need to set up these fields:
| Key | Value |
|---|---|
| Base URL | https://freelancer-inc.vercel.app |
| Sign-in URL | https://freelancer-inc.vercel.app/api/auth/login |
| Allowed Logout URLs | https://freelancer-inc.vercel.app/api/auth/logout |
| Allowed Callback URLs | https://freelancer-inc.vercel.app/api/auth/callback |
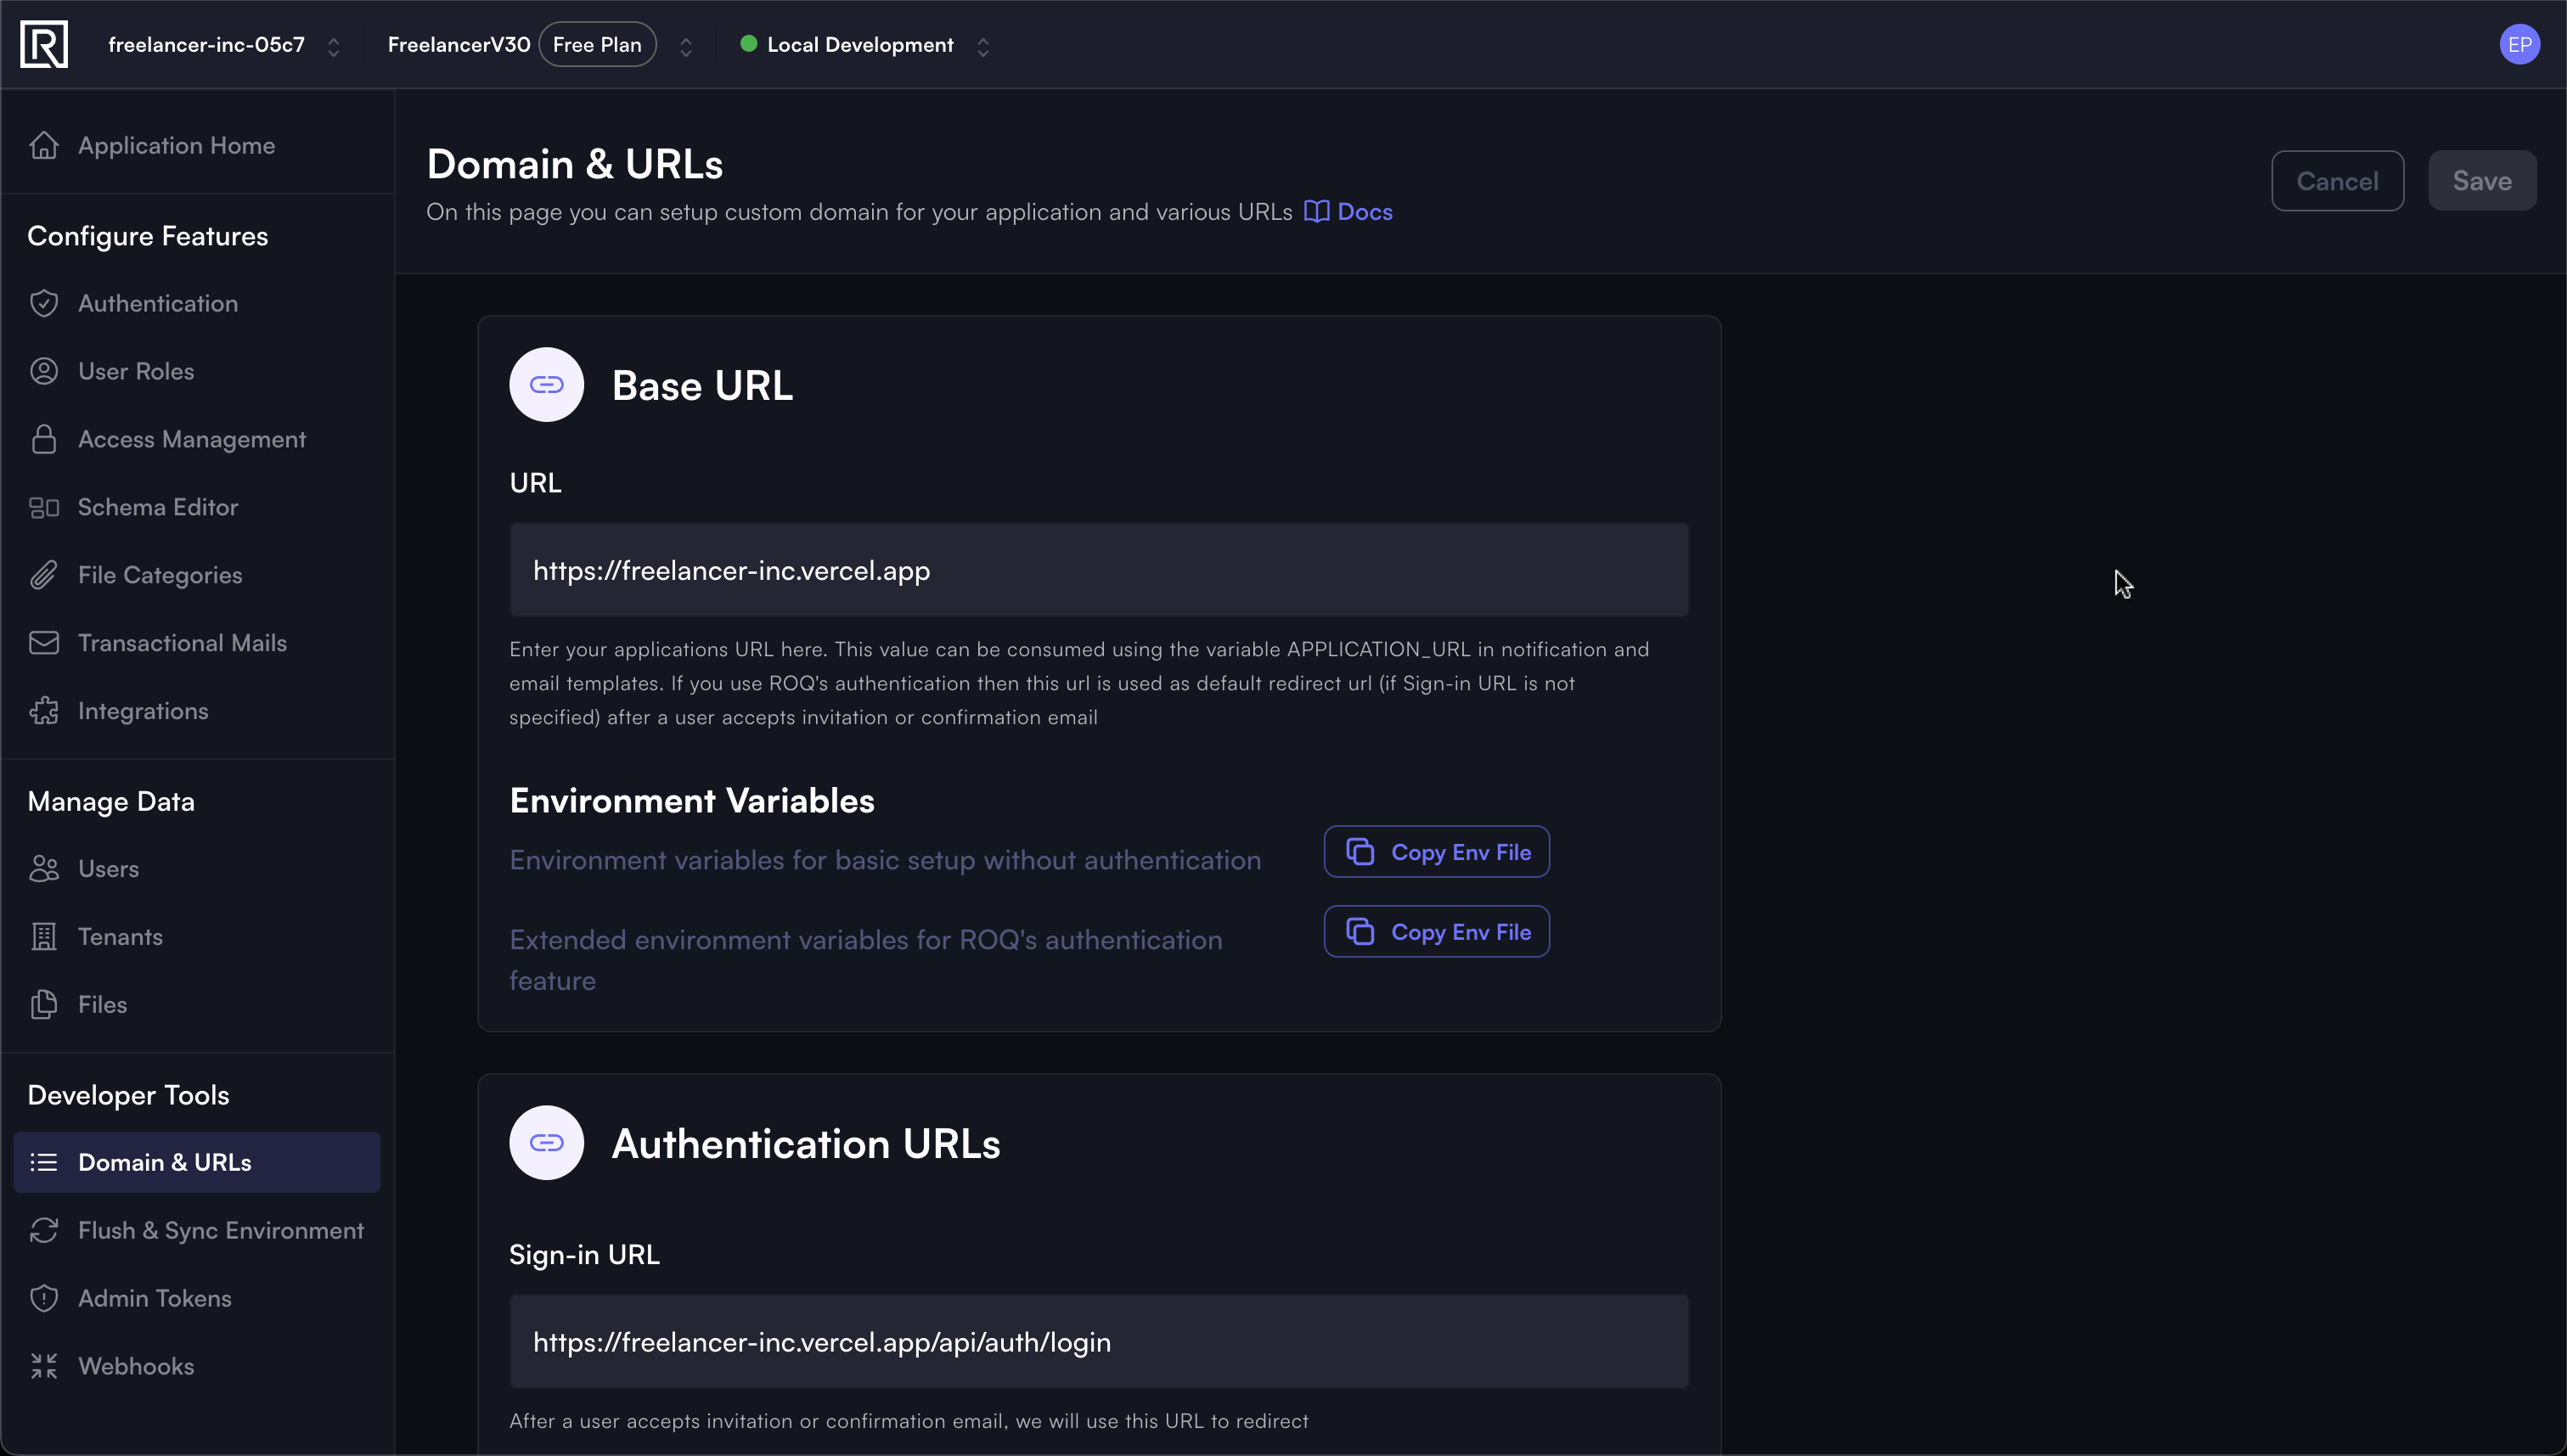
Make sure you change all base URL settings on ROQ Console, save it, and then click the Copy Env File button for the Extended environment variables for ROQ's authentication feature. Copy all the environment variables and save them somewhere or save them into a .env file in our locally generated project repository.
Vercel Environments
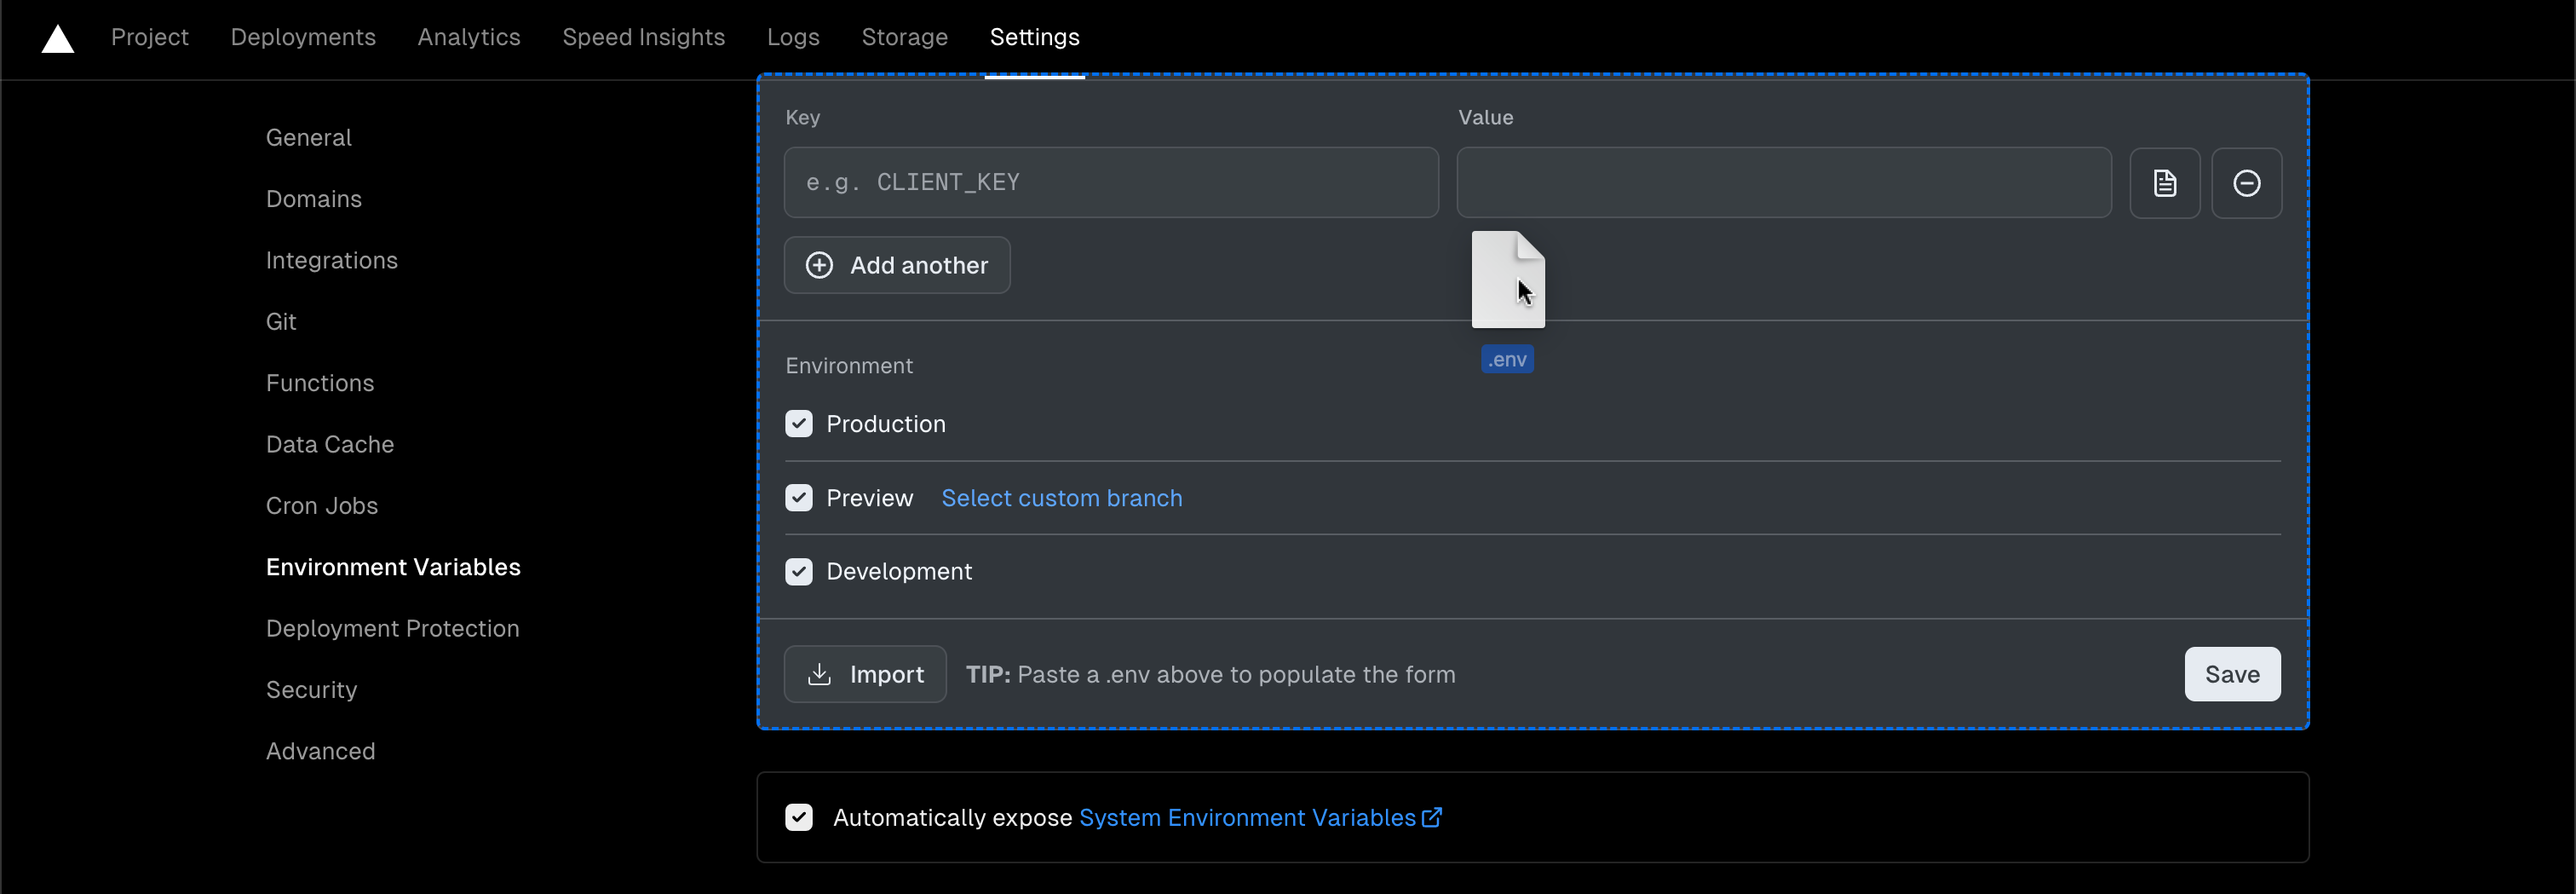
The next step is to import the .env file into our Vercel project. Go to Settings → Environment Variables.
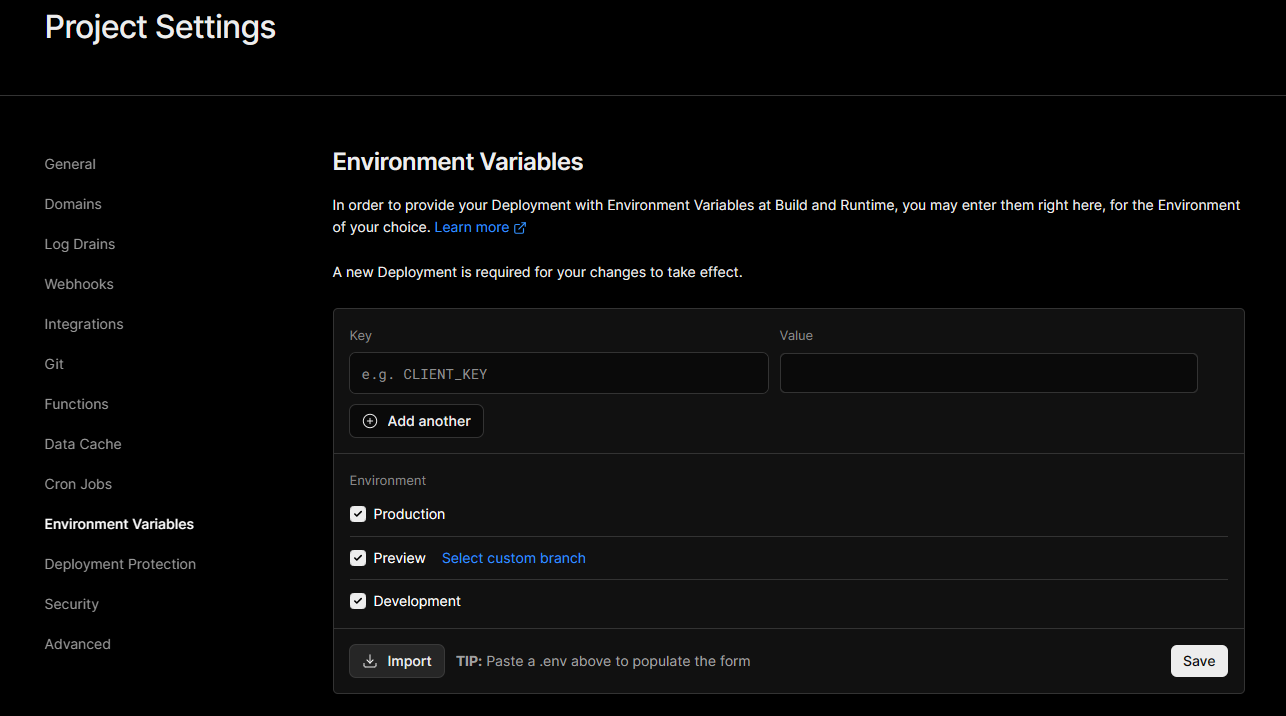
And then click the Import button to populate the environment variables from the .env file.
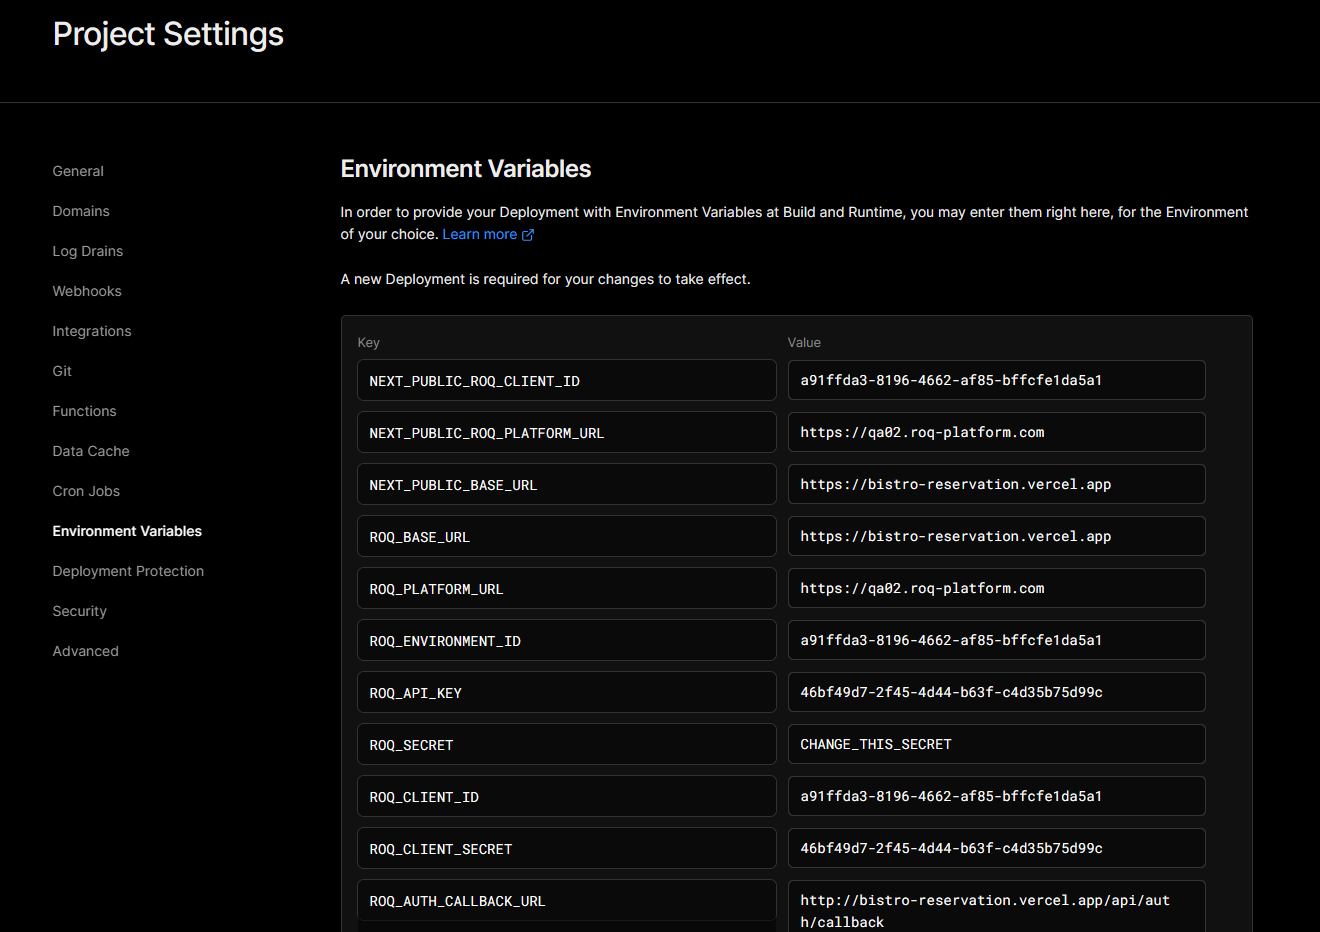
Another easy way to populate environment variables is to drag and drop the .env file into the Environment Variables section.
At this stage, the project can be redeployed manually from the Vercel Deployment tab or if you push any changes in the connected repository branch. The build process will be successful.
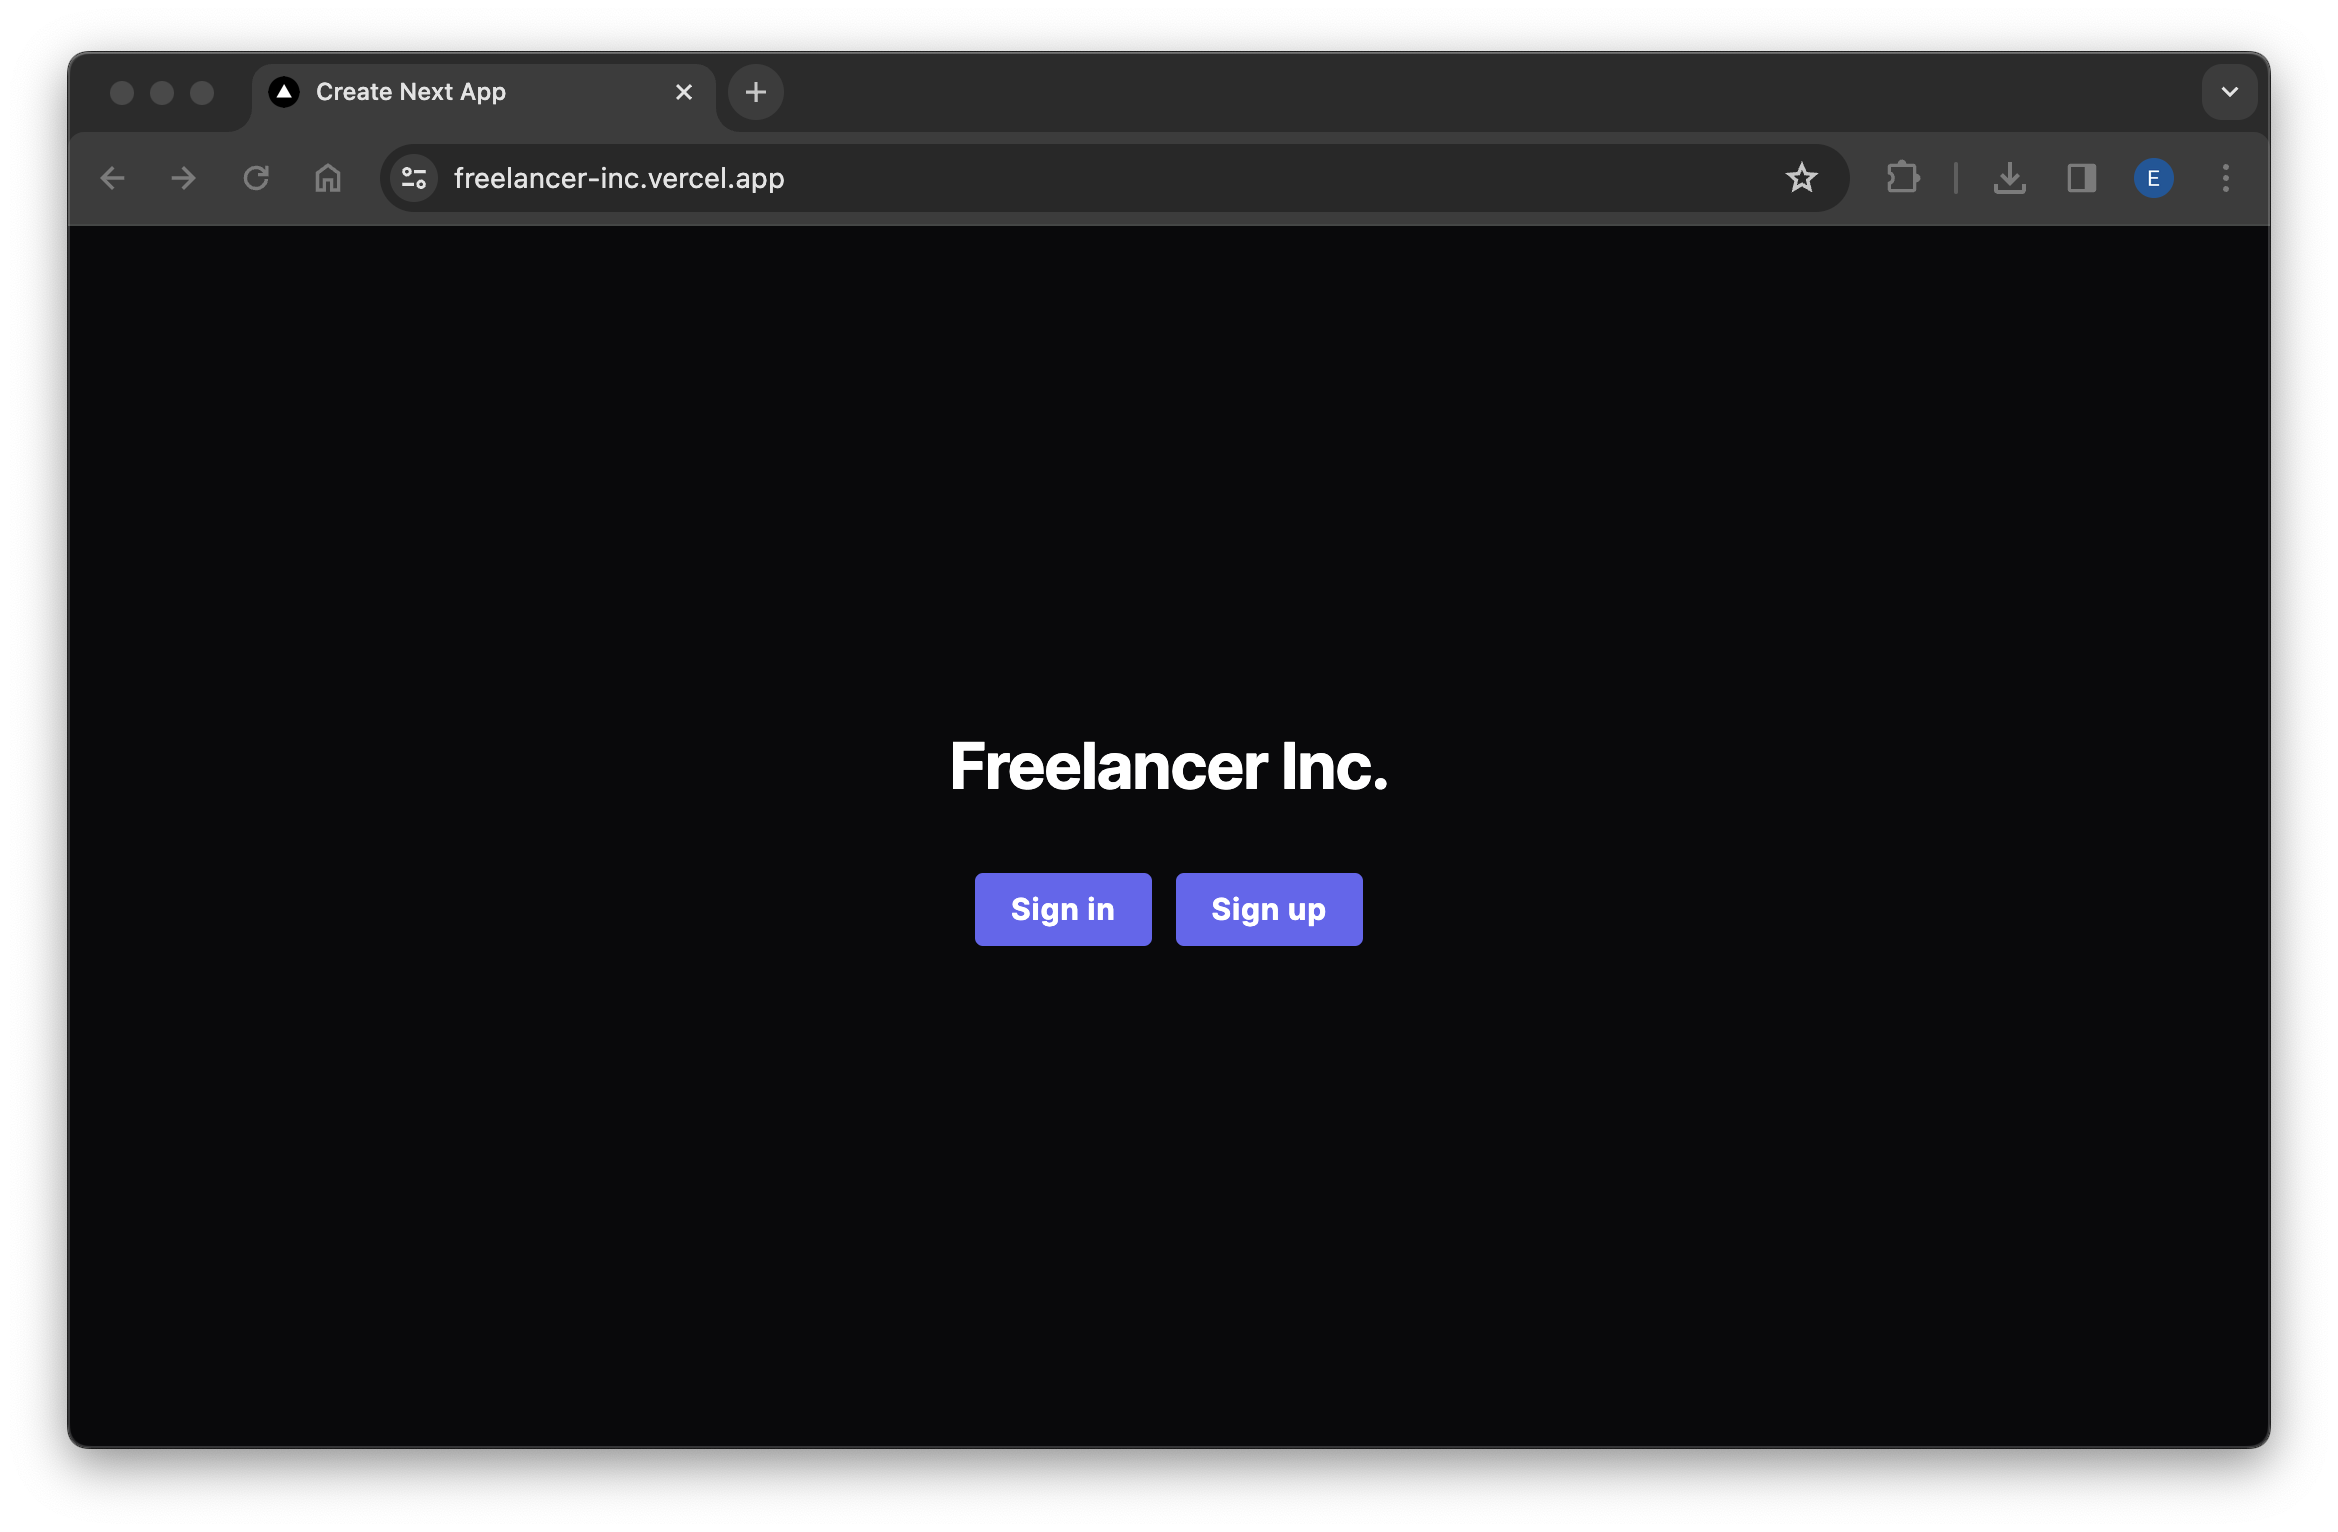
Installation Test
To test the installation, open the browser and go to the project URL.