List projects for freelancer
In this tutorial, we will learn how to retrieve and render a list of data from ROQ in Next.js. We will use the ROQ SDK to query data from BaaS and render the data in a list.
This tutorial is about a straightforward Software as a Service (SaaS) platform for freelance workers. The platform will have two unique user roles, namely the Business Owner and the Freelancer. The Business Owner will be able to create projects while the Freelancer will have the ability to view and apply for projects. This tutorial will only cover the Freelancer role.
Project setup
Before we start, make sure to follow the previous tutorial:
-
Create project form and how to save projects
The tutorial will guide you through the process of setting up a Next.js application and connecting it to ROQ BaaS. There are some changes to the code from the previous tutorial. These changes are necessary because we will build the app for the Freelancer role this time. The changes are:
- Change the roles to
freelancerwhen the user (freelancer) registers or sign-in. - Change the page to redirect to the
freelancerpage for any successful login.
The
pages.tsxpage is responsible for user authentication. We will change the code to the following:src/app/page.tsximport { roqBrowserClient } from "@/lib/roq/roq-client"; export default function Home() { const handleSignUp = async () => { await roqBrowserClient.signUp('freelancer', { postLoginRedirect: 'http://localhost:3000/freelancer' }); }; const handleSignIn = async () => { await roqBrowserClient.signIn('freelancer', { postLoginRedirect: 'http://localhost:3000/freelancer' }); }; return ( {/* the code here is the same as before */} ); } - Change the roles to
Building project list page
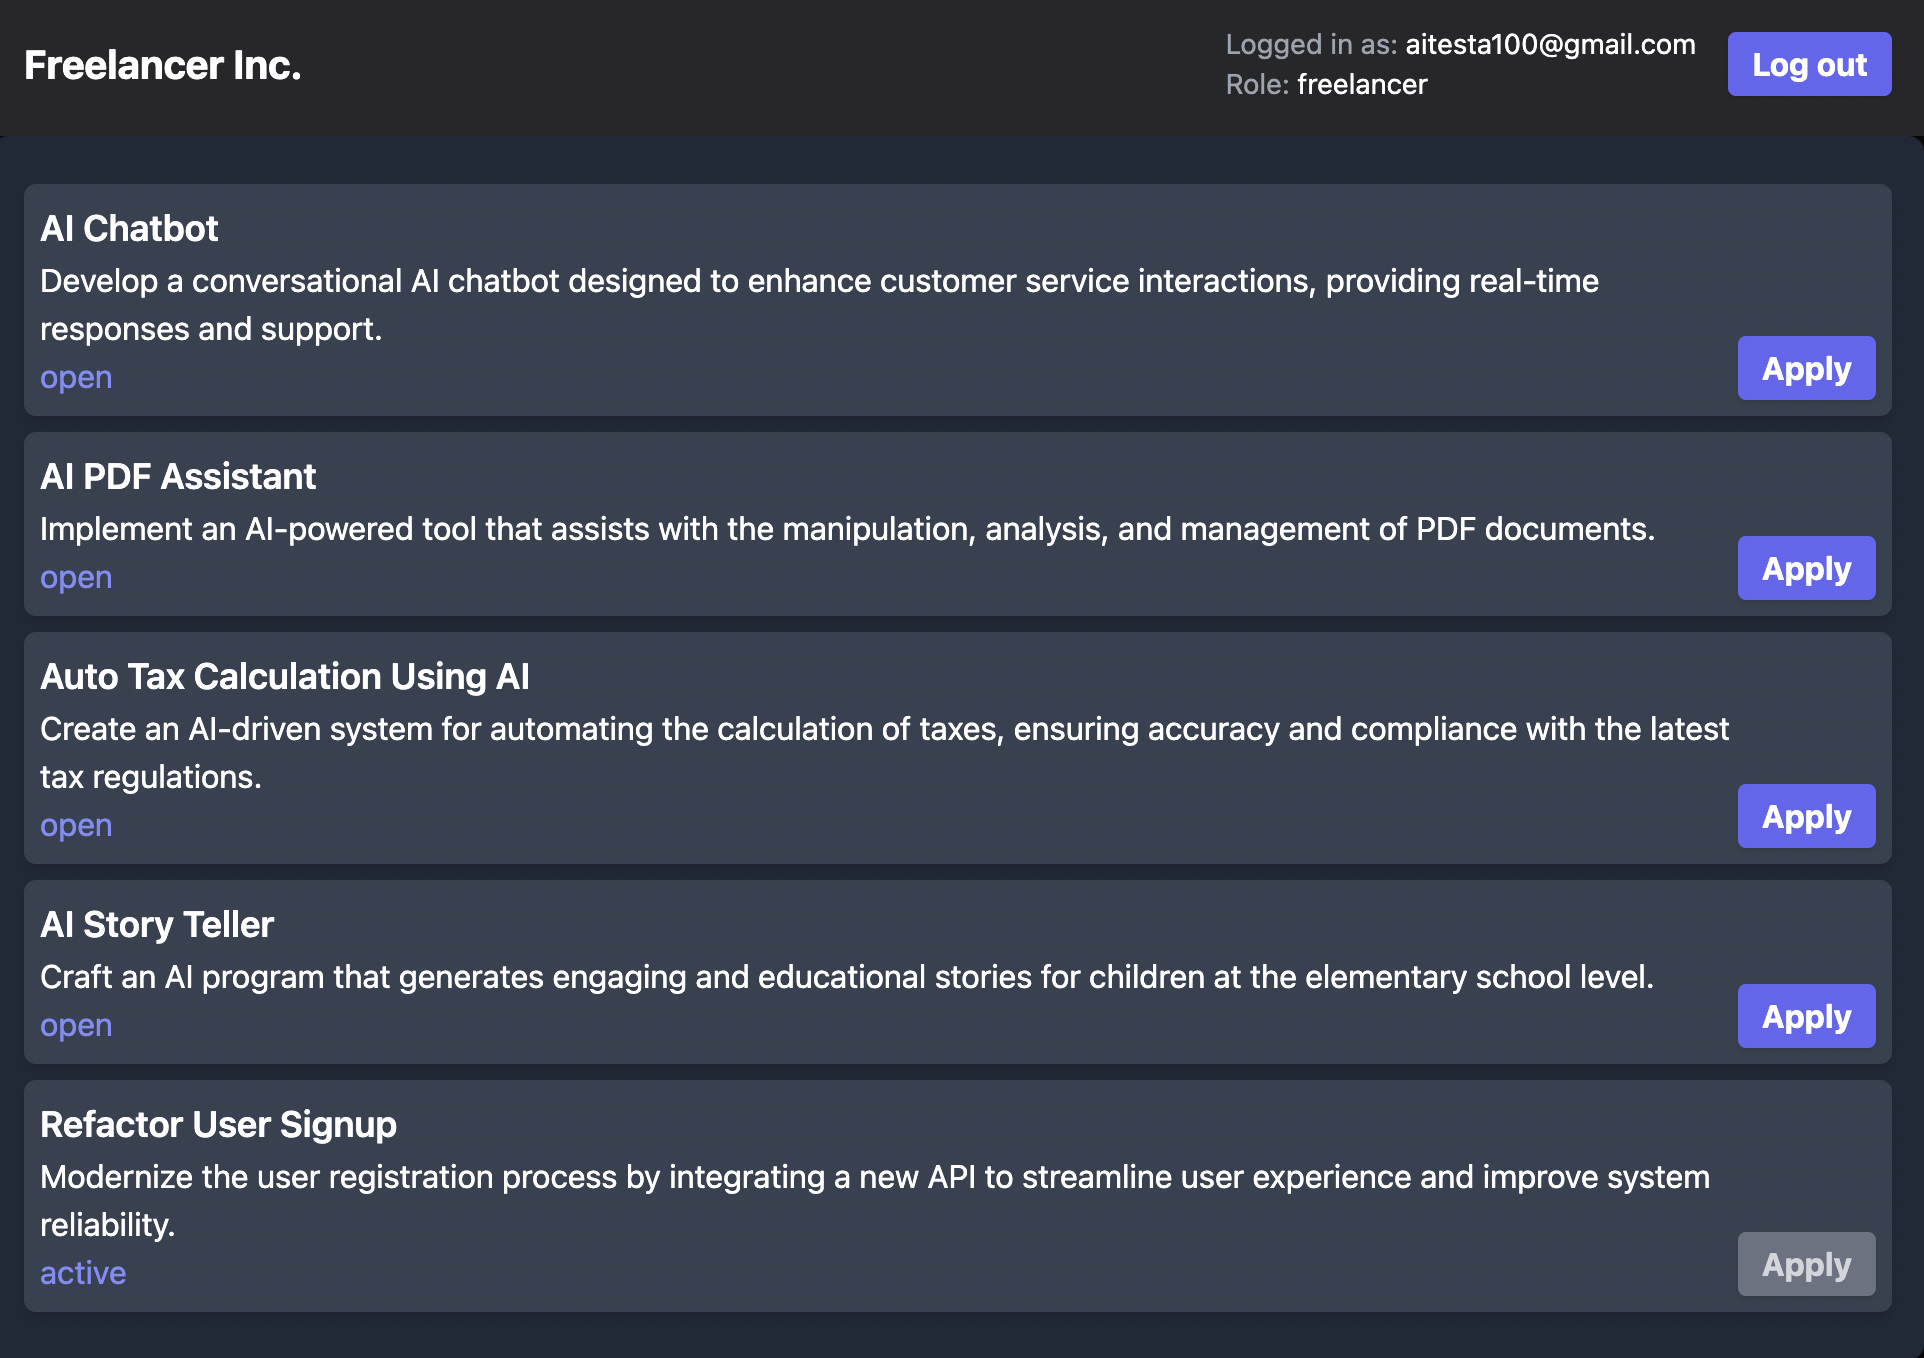
We will build a simple project list to show all projects that have been created by the Business Owner. The project list will be displayed in the Freelancer page.
Create a project list page
Create a new page called page.tsx in the src/app/freelancer directory. The page will be the project list for the freelancer. The code below is the complete code for the page:
import { roqBrowserClient } from "@/lib/roq/roq-client";
import { useSession } from '@/lib/roq/roq-hooks';
import { useEffect, useState } from 'react';
import { ItemType } from '@/interface/project-data-types';
import ProjectList from '../project-list';

export default function Projects() {
    const { session } = useSession();
    const [projects, setProjects] = useState<ItemType[]>([]);

    const roles = session?.user.roles || [];

    const logoutHandler = () => {
        roqBrowserClient.signOut();
    };

    useEffect(() => {
        const fetchProjectData = async () => {
            const projectData = await roqBrowserClient.project.findManyWithCount({
                orderBy: {
                    created_at: 'desc'
                }
            })
            return projectData
        }

        fetchProjectData().then((projects) => {
            setProjects(projects.data)
        })

    }, [])

    return (
        <div className="flex flex-col w-full h-screen bg-zinc-950">
            <nav className="flex justify-between items-center p-4 bg-zinc-800 shadow">
                <h1 className="text-white text-xl font-bold">Freelancer Inc.</h1>
                <div className="flex items-center gap-4">
                    <div>
                        <p className="text-gray-400 text-sm">
                            Logged in as: <span className="text-white">{session?.user.email}</span>
                        </p>
                        <p className="text-gray-400 text-sm">
                            Role: <span className="text-white">{roles[0]}</span>
                        </p>
                    </div>
                    <button onClick={logoutHandler} className="px-3 py-1 bg-indigo-500 rounded shadow text-white font-bold">
                        Log out
                    </button>
                </div>
            </nav>
            <ProjectList items={projects} />
        </div>

    );
}
The heart of this code is query data from BaaS using the ROQ SDK. The code below is the query data code:
const projectData = await roqBrowserClient.project.findManyWithCount({
    orderBy: {
        created_at: 'desc'
    }
})
The code above will retrieve all project data from BaaS and sort the data by the created_at field in descending order. The data will be rendered in the <ProjectList> component.
Create a project list component
Create a new component called project-list.tsx in the src/app directory. This component is the <ProjectList> component that we used in the previous code. The component will render the list of projects that the Business Owner has created.
import React from 'react';
import { ProjectListType } from '@/interface/project-data-types';

const List: React.FC<ProjectListType> = ({ items }) => {

    const handleApply = (projectId: string) => {
        // Logic to apply for the project
        console.log(`Applying for project with ID: ${projectId}`);
    };

    return (
        <div className="bg-gray-800 p-4 rounded-lg">
            {items.map((item, index) => (
                <div
                    key={index}
                    className="flex justify-between items-end bg-gray-700 text-white p-2 my-2 rounded-md shadow-md"
                >
                    <div>
                        <h3 className="text-lg font-semibold">{item.name}</h3>
                        <p>{item.description}</p>
                        <span className="text-indigo-400">{item.status}</span>
                    </div>
                    <button
                        onClick={() => handleApply(item.id)}
                        disabled={item.status !== 'open'}
                        className={`px-3 py-1 rounded shadow font-bold ${
                            item.status === 'open' ? 'bg-indigo-500 text-white' : 'bg-gray-500 text-gray-300'
                        }`}
                    >
                        Apply
                    </button>
                </div>
            ))}
        </div>
    )
};

export default List;
Add interface for project list
This page uses an interface to define the data type for the project list. Open the file called project-data-types.ts in the src/interface directory. Add this project list interface in the code and change the export type:
// the code here is the same as before

interface ProjectListType {
    items: ItemType[];
}

export type { ItemType, ProjectListType, StatusMessageType, ProjectFormProps };
What have we built?
If you follow this tutorial from the beginning, we will build a simple project list page for the Freelancer role. The page displays all projects created by the Business Owner.