Introduction
ROQ is a backend for SaaS applications. It is designed to fit the typical creation process of SaaS applications. This page describes the usual flow of a project setup and how to do it with ROQ. We'll use three examples that you can ( hopefully) relate to:
- Food Delivery App, where restaurants manage their menus and customers can order food.
- Freelancer Marketplace, where companies can publish job offers, and freelancers can apply
- Doctor's Office Software, where doctors and patients can schedule and manage appointments.
0. Preparation
Before starting with ROQ, it's recommended to have the requirements of your next B2B SaaS application prepared. It doesn't matter if you prefer to write user stories or draw wireframes as long as you have a solid understanding of what you want to realize.
1. Define Tenant
When you build a B2B SaaS application, you usually start with defining your "business customers" (~tenant). With ROQ, you can use any name for your tenant that fits the use case.
For instance, the typical business customer in the Food Delivery App could be called a Restaurant.
More examples:
| Application | (Typical) name of tenant |
|---|---|
| Freelancer Marketplace | Company |
| Doctor's Office Software | Doctor's Office |
Read this documentation to learn more about multi-tenancy.
2. User Roles
Now, define which "types of users" (~roles) exist in your application and whether they relate to the tenant. ROQ enables you to configure user roles using ROQ's advanced user role system.
For example, in the Food Delivery App, you could have roles like Owner, Waiter, and Customer. The * Owner* role is responsible for managing the restaurant account. This role should be assigned to the first user who signs up, creates a restaurant tenant, and sets the name (like "Happy Kitchen"). Then, the Owner can invite other users to her restaurant and set their roles to Owner or Waiter.
In contrast, the Customer is an independent user role that doesn't belong to any restaurant. Therefore, the * Customer* role has a dedicated signup form that doesn't have input fields like "Restaurant name".
More examples:
| Application | Roles that belong to the tenant | Independent user role |
|---|---|---|
| Freelancer Marketplace | Admin, Recruiter | Freelancer |
| Doctor's Office Software | Doctor | Patient |
Read this documentation to learn more about user roles.
3. Schema
A well-thought-out database schema represents your application's basement and requires careful engineering. With ROQ,
you can visually design your database schema using the entity relationship diagram technique and optional AI support.
Every schema has an entity called user that represents any user, regardless of the role. In addition, a table
represents the tenant. For example, A restaurant is represents the tenant and the table is called restaurant.
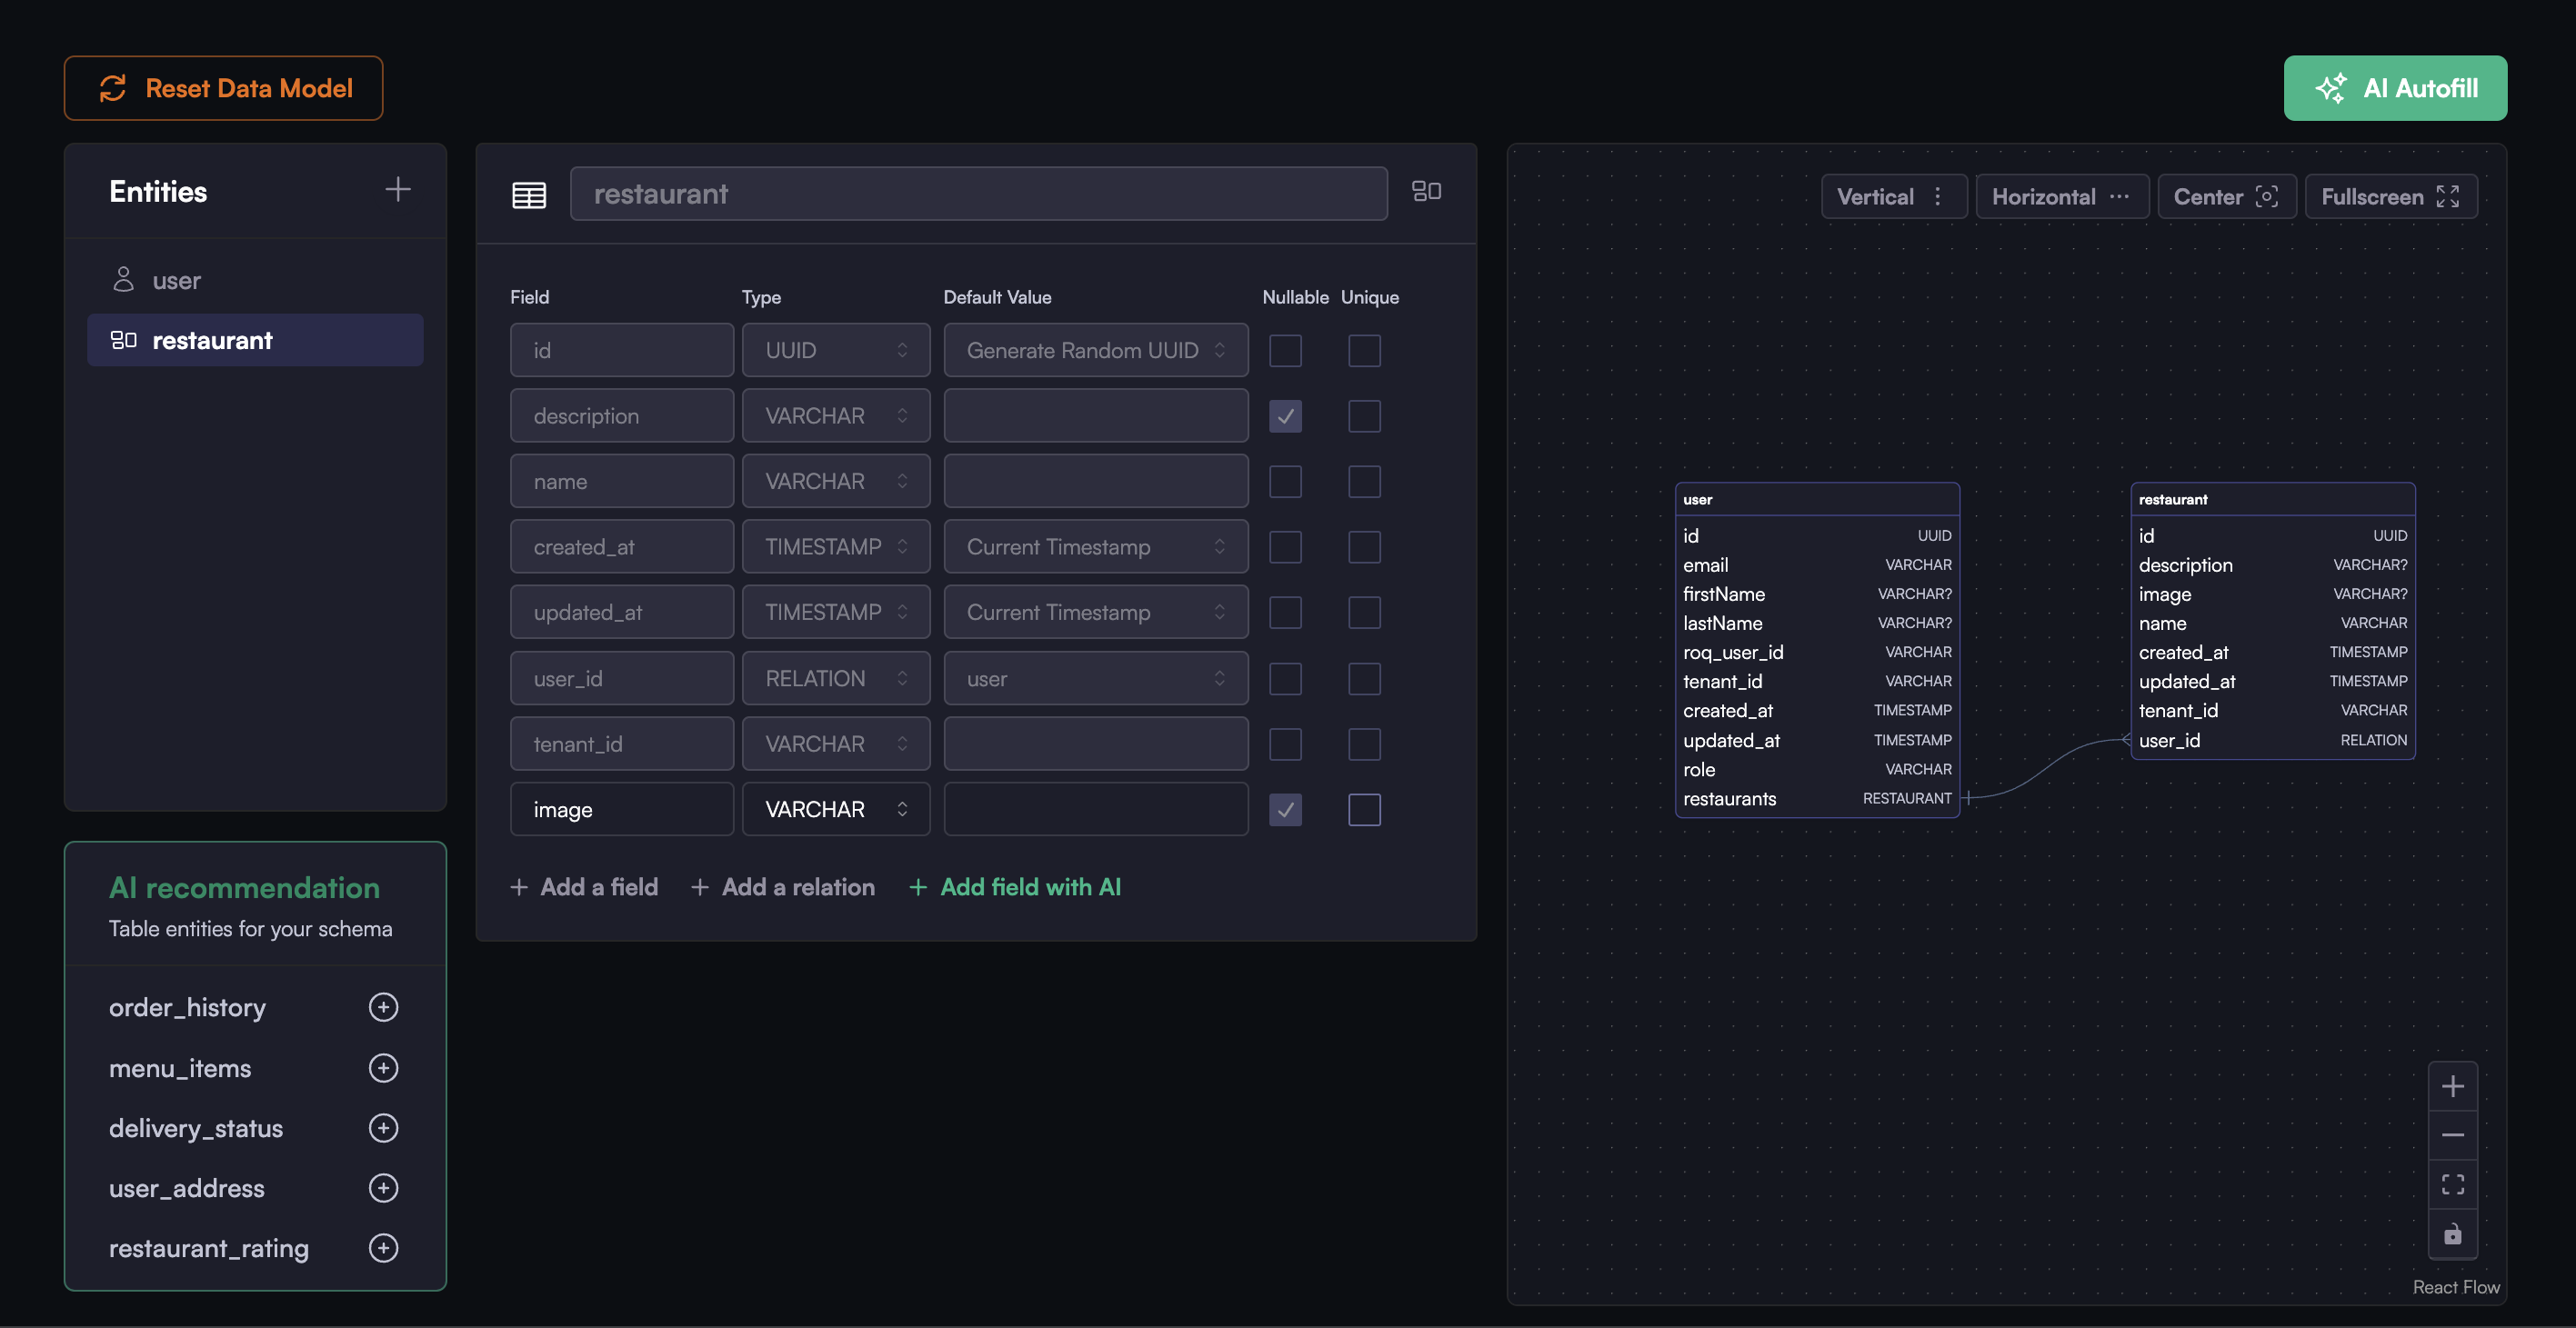
More information about the schema editor can be found in this documentation.
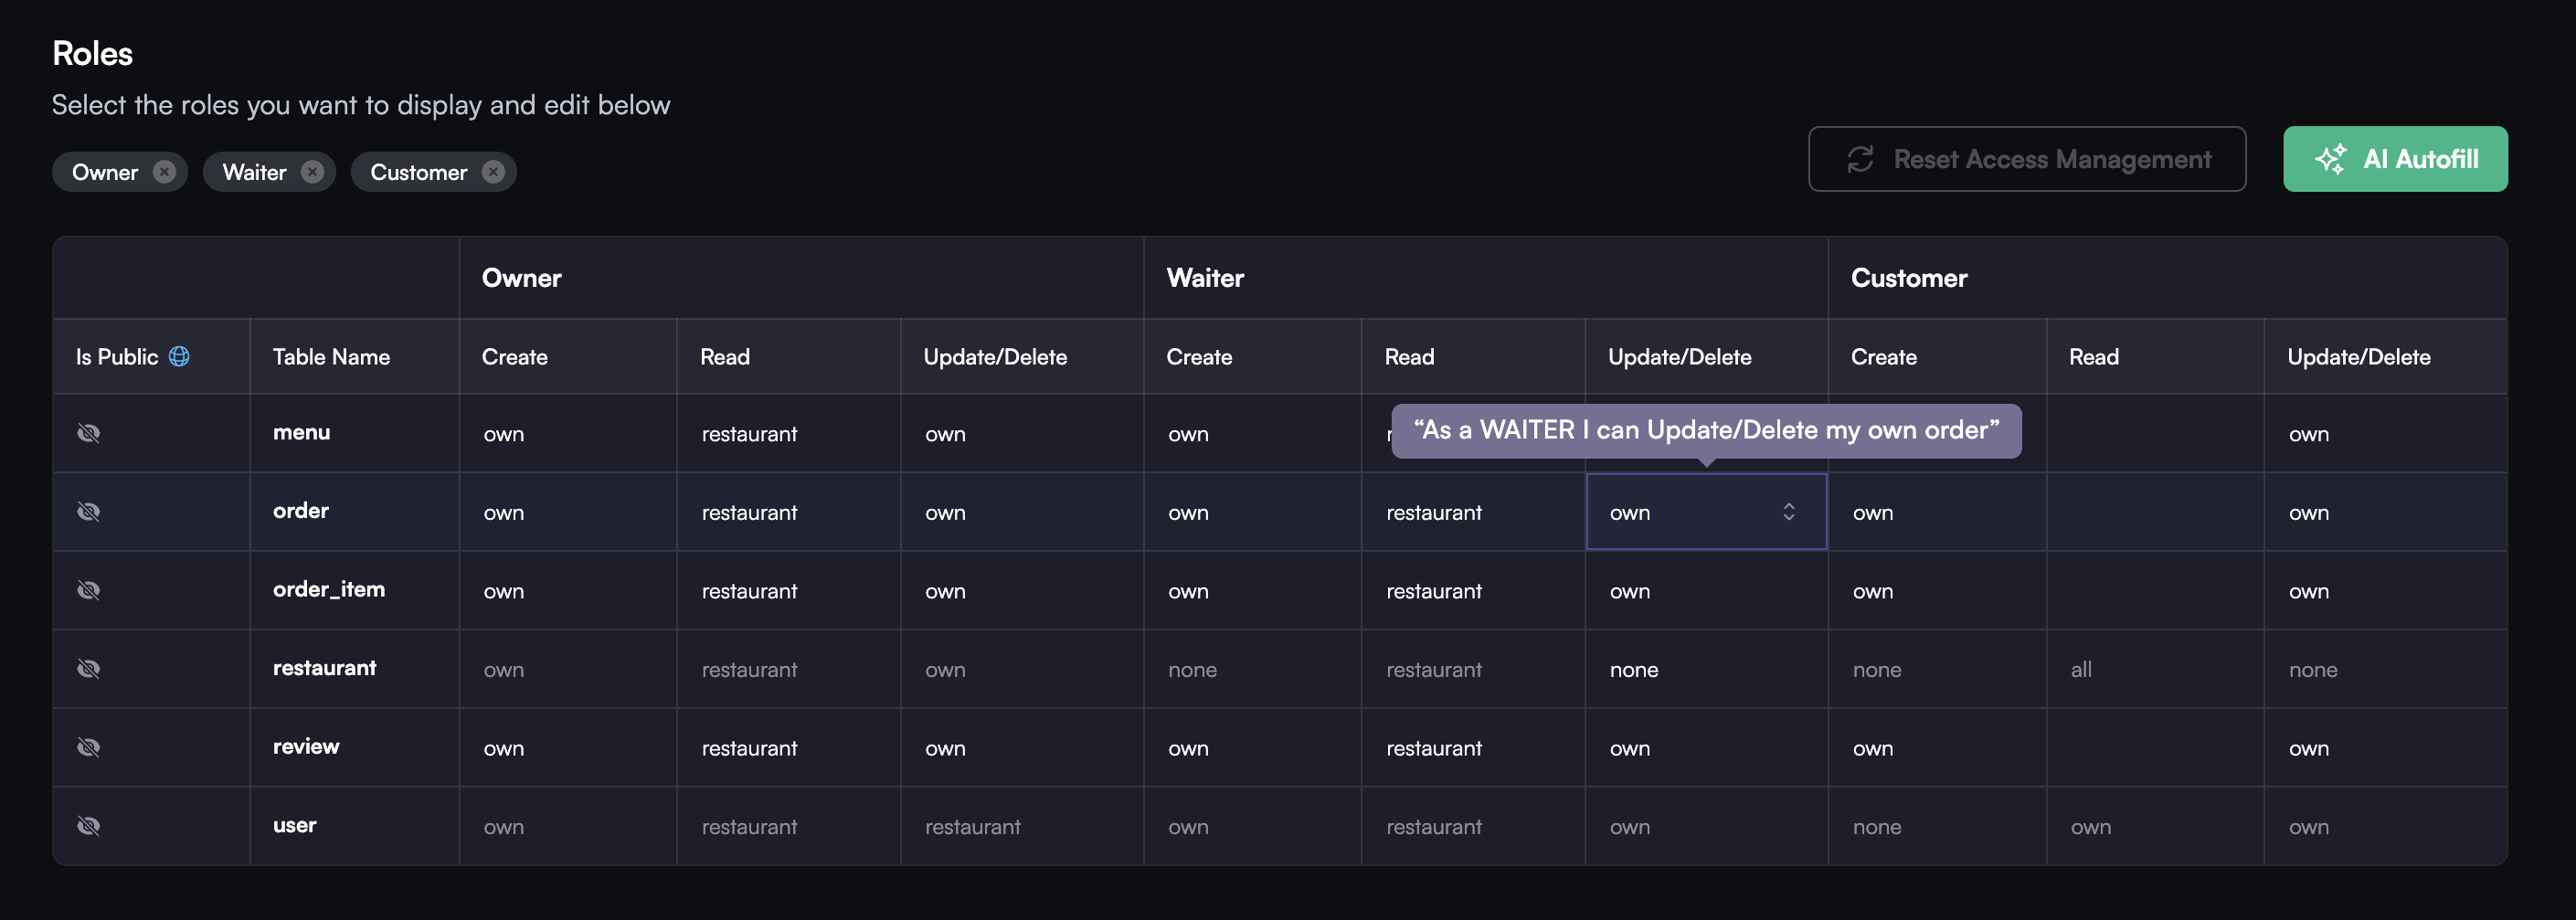
4. Permissions
It's time to combine your user roles and schema by defining access rules (~permissions). The easiest way to create a list of permissions is to extract them from your user stories.
Let's say you have a user story like this: "As a Waiter, I can manage my orders". You can easily translate this user
story into permissions, which means the user role chef has read and write access to the order entity within the scope
of its tenant ("restaurant", in this case). Our AI assistant can support you if you need help with the correct
permissions.
5. Technology selection
Finally, before you start development, you need to decide on the tech stack. ROQ supports the most common full-stack frameworks like Next.js, Nuxt.js, and RedwoodJS.