Schema Editor
What is Schema Editor?
The Schema Editor is an integral component of the console, designed to empower users in shaping the structure of their backend database. With this tool, you can define tables (entities), establish relationships between them, visually inspect their configurations, and ultimately deploy them. Once you publish your schema, the API that users utilize to access ROQs BaaS will seamlessly adopt the newly defined data model.
How Does it Work?
The general flow is as follows:
Create Entities
Create entities or update existing ones in your backend's database schema.
Set Relations
Create or update relations between entities.
Publish schema
Publish your new schema.
Access Schema
Access the schema via the API.
You can do all of this in one place in the Console, under the Configure > Schema Editor page.
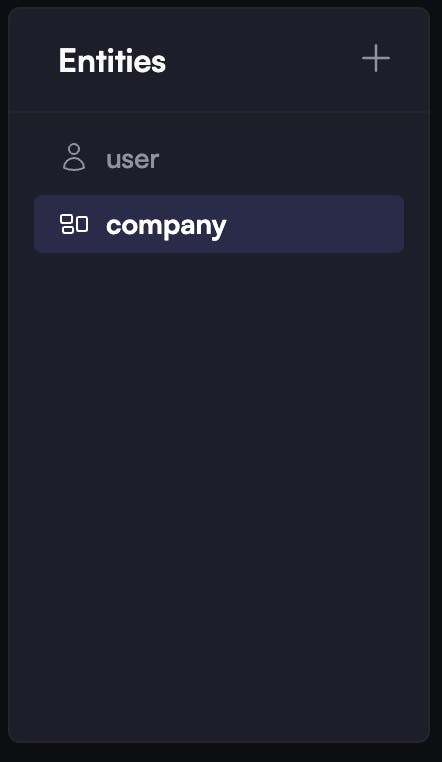
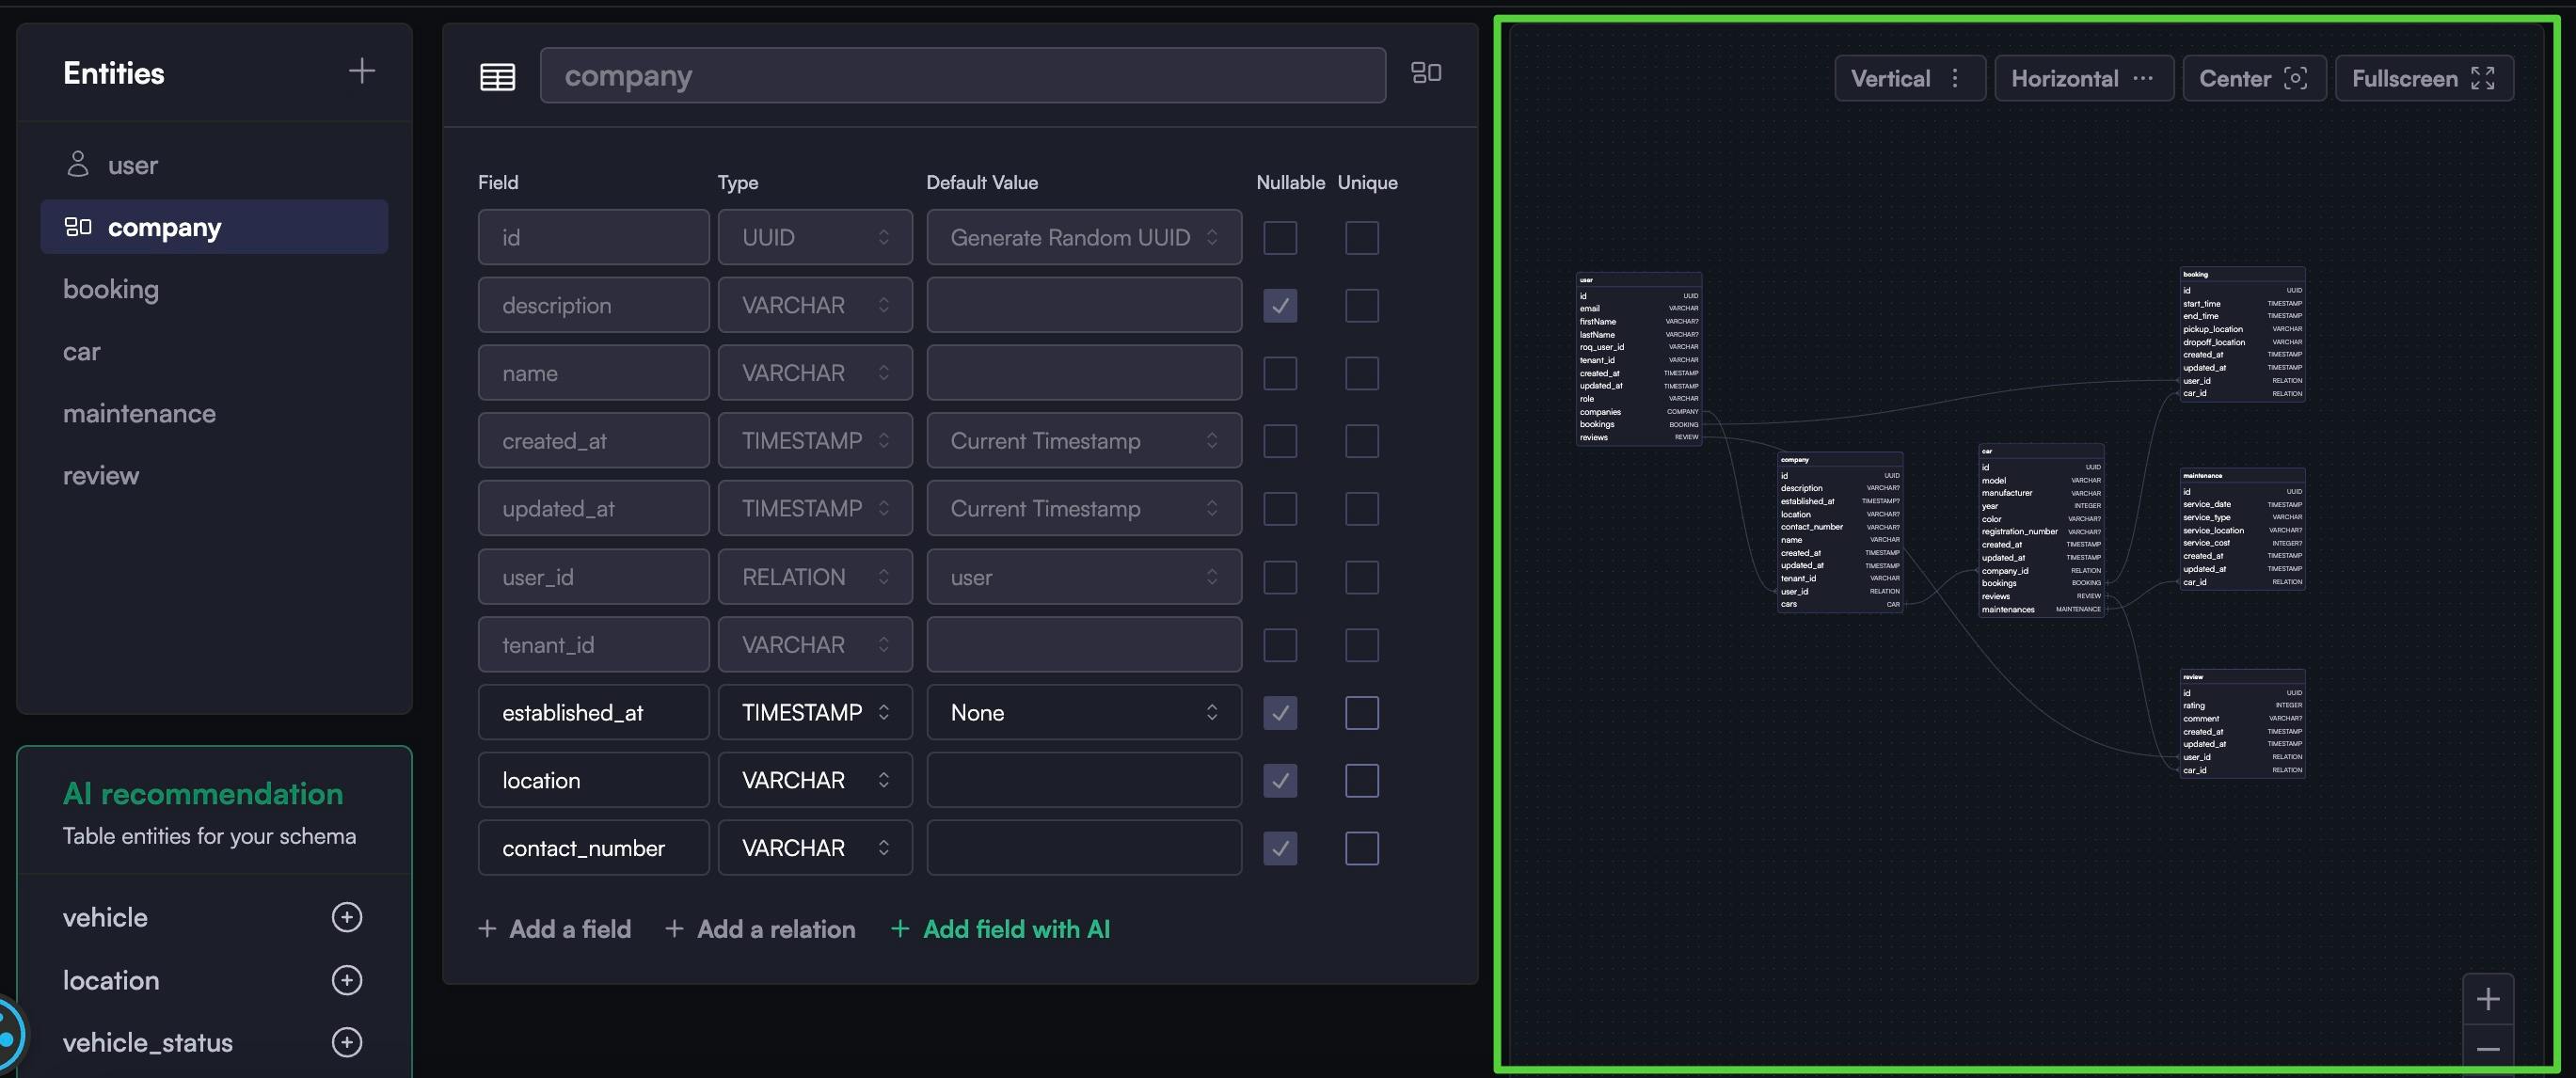
Entities
An entity represents a table in your backend's database. It represents a real-world object or concept. For example, an entity can be a menu, menu item, or order in the context of a Restaurant Management Application.
On the Schema Editor page, users can:
- Create an entity
- Update an entity
- Delete an entity
- Set up relationships between entities
Entities that can't be deleted:
Entities can be deleted, but it's important to note that there are two entities that cannot be removed:
- The first is the "user" entity, which contains user-related data, and the second is the "tenant" entity.
- These two entities are fundamental to the functionality of the backend and cannot be removed.
Creating an Entity
There are three ways to do it:
- Via the "Add Entity" button
- By adding from "AI Recommended Entity"
- Using AI Autofill
Add Entity Button
When clicking on the "+" button, you create a new entity. You need to fill in the following information:
- Entity name
- Field name
- Field type. The Schema Editor supports the following field types: text, varchar, float, integer, boolean, timestamp, and relation. If you set "relation" as a field type, you need to set the related table in the default value.
- Default value
- Nullable (yes/no)
- Unique (yes/no)
- Add a new field
- Add a relation
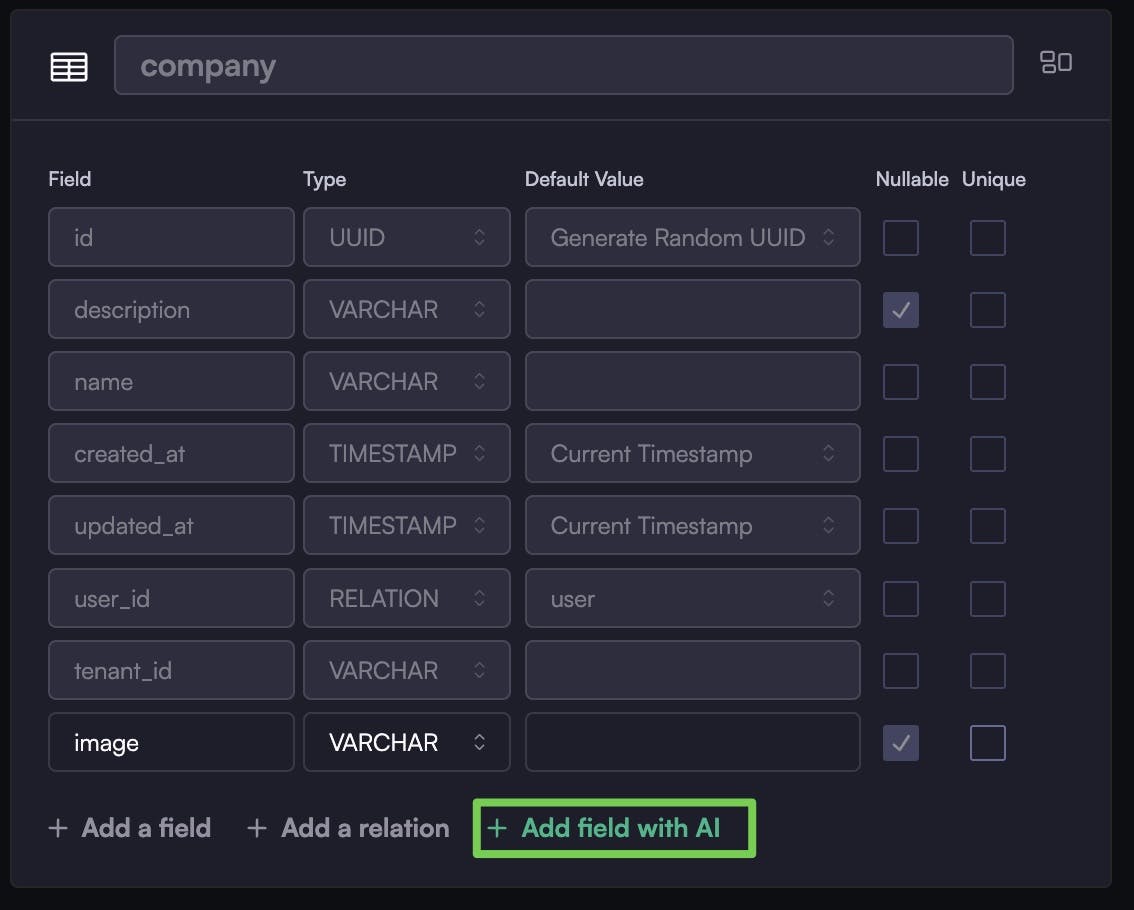
- Add a field with AI
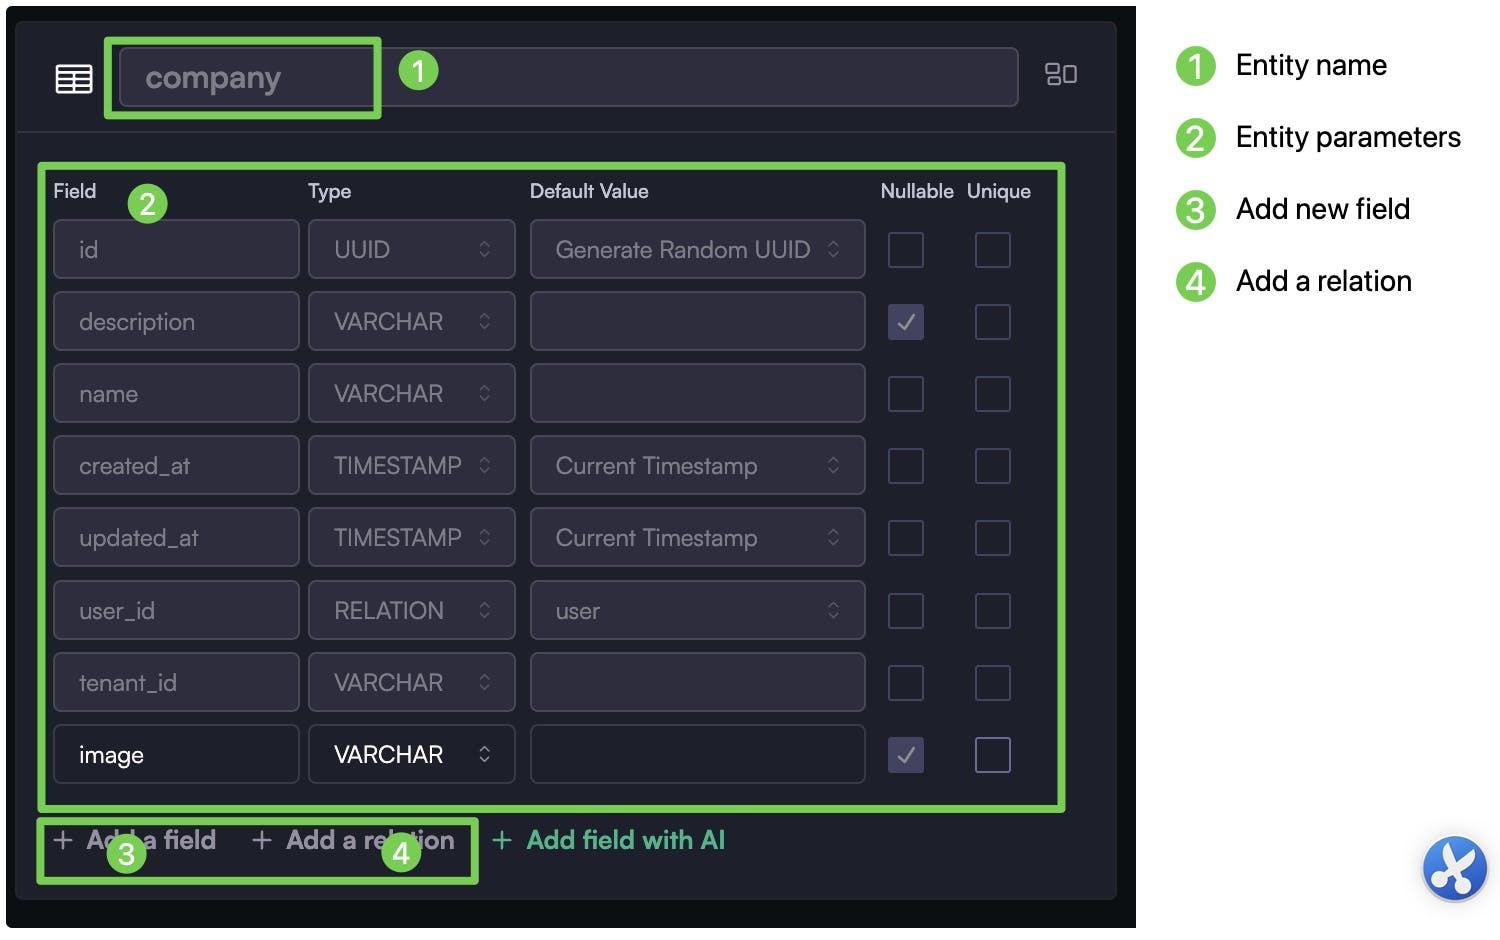
All changes made to the entities are displayed on the left side of the visualization window.
What Does "Nullable" Mean?
The "nullable" attribute defines whether a field can contain null (empty) values or not.
Public vs. Private Entities
Entities can be marked as either public or protected, with the default setting being protected. When an entity is marked as public, there is no protection at all. Anyone can fetch the API without providing an access token (i.e., being logged in).
AI Assistance
Users have the option to add a field with AI assistance. In this case, the console generates a new field based on the context of the entity. Another method to add entities to the list is through the "AI Recommend" feature. AI pre-generates a selection of relevant entities, and they can be added to the list with a single click, allowing for further editing.
Publishing Schema
It's important to emphasize that while the schema is automatically saved, it must be published to be reflected in the API. Publishing may take a few minutes, and a progress bar at the top of the page will indicate the status. During the publishing process, users can continue to edit the schema, but they can only initiate another publish once the current one is completed. In the event of errors during publishing, such as migration failures, the recommended action is to attempt publishing again.
Even if a user leaves this page, publishing continues in the background. Once completed, a notification will be displayed within the console.
AI Autofill
AI Autofill is another notable feature on this page. Clicking it will populate the entities, relationships, and schema with AI-recommended values. However, be cautious, as the auto-filled data can be edited but might not entirely align with your specific needs.

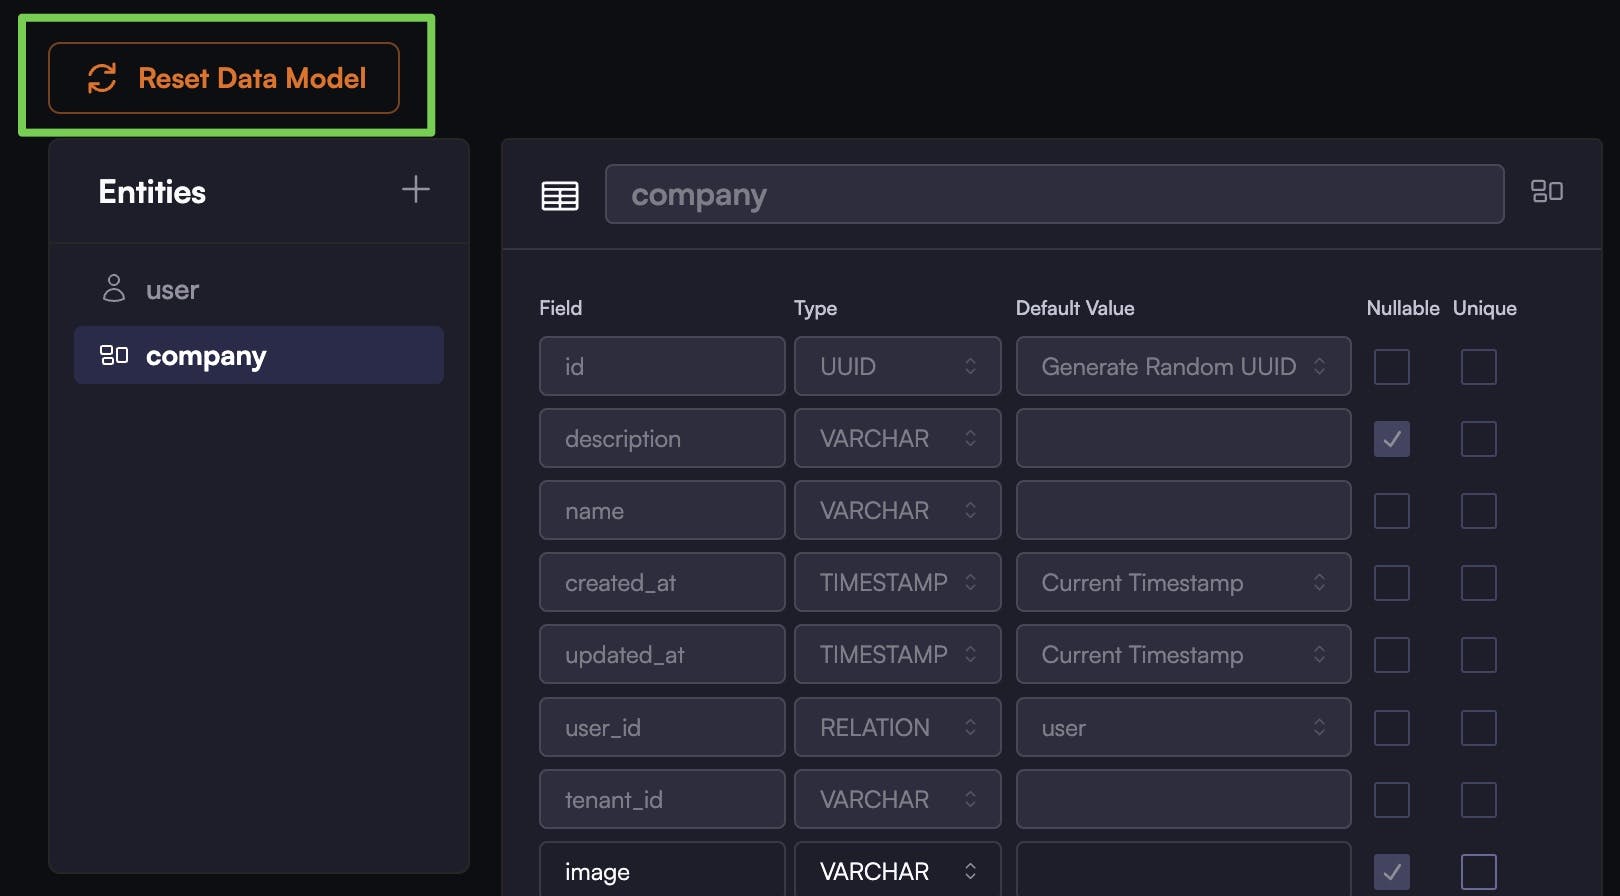
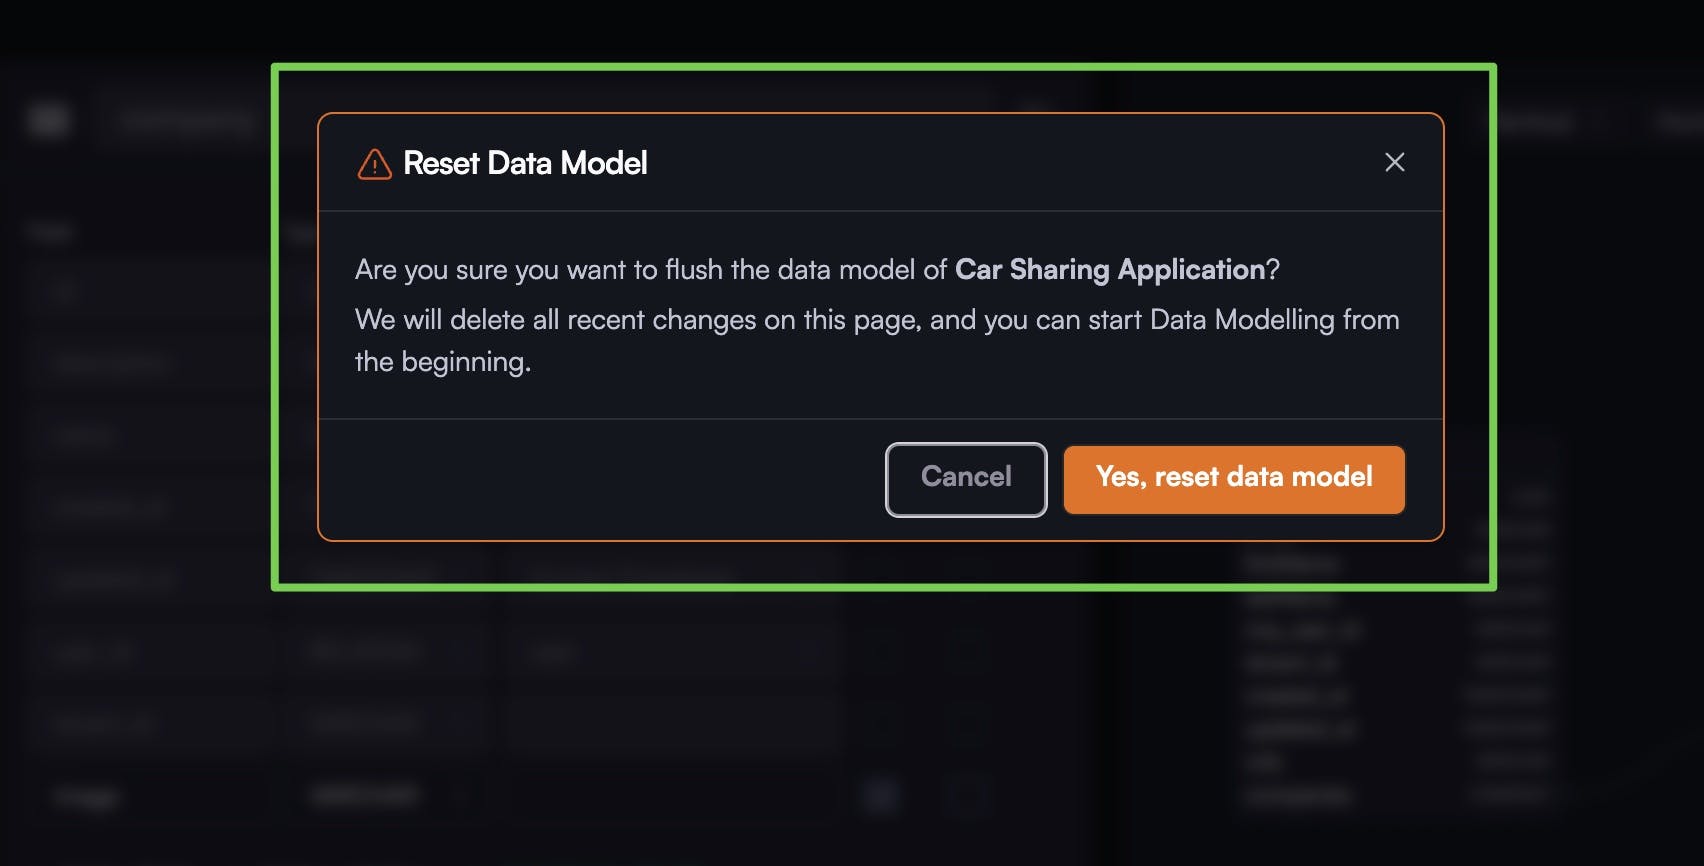
Reset Data Model
For a fresh start, there's a "Reset Data Model" option. Clicking this will remove all changes made in the current session (anything created on this page before publishing) and restore the page to its state before the last publish.
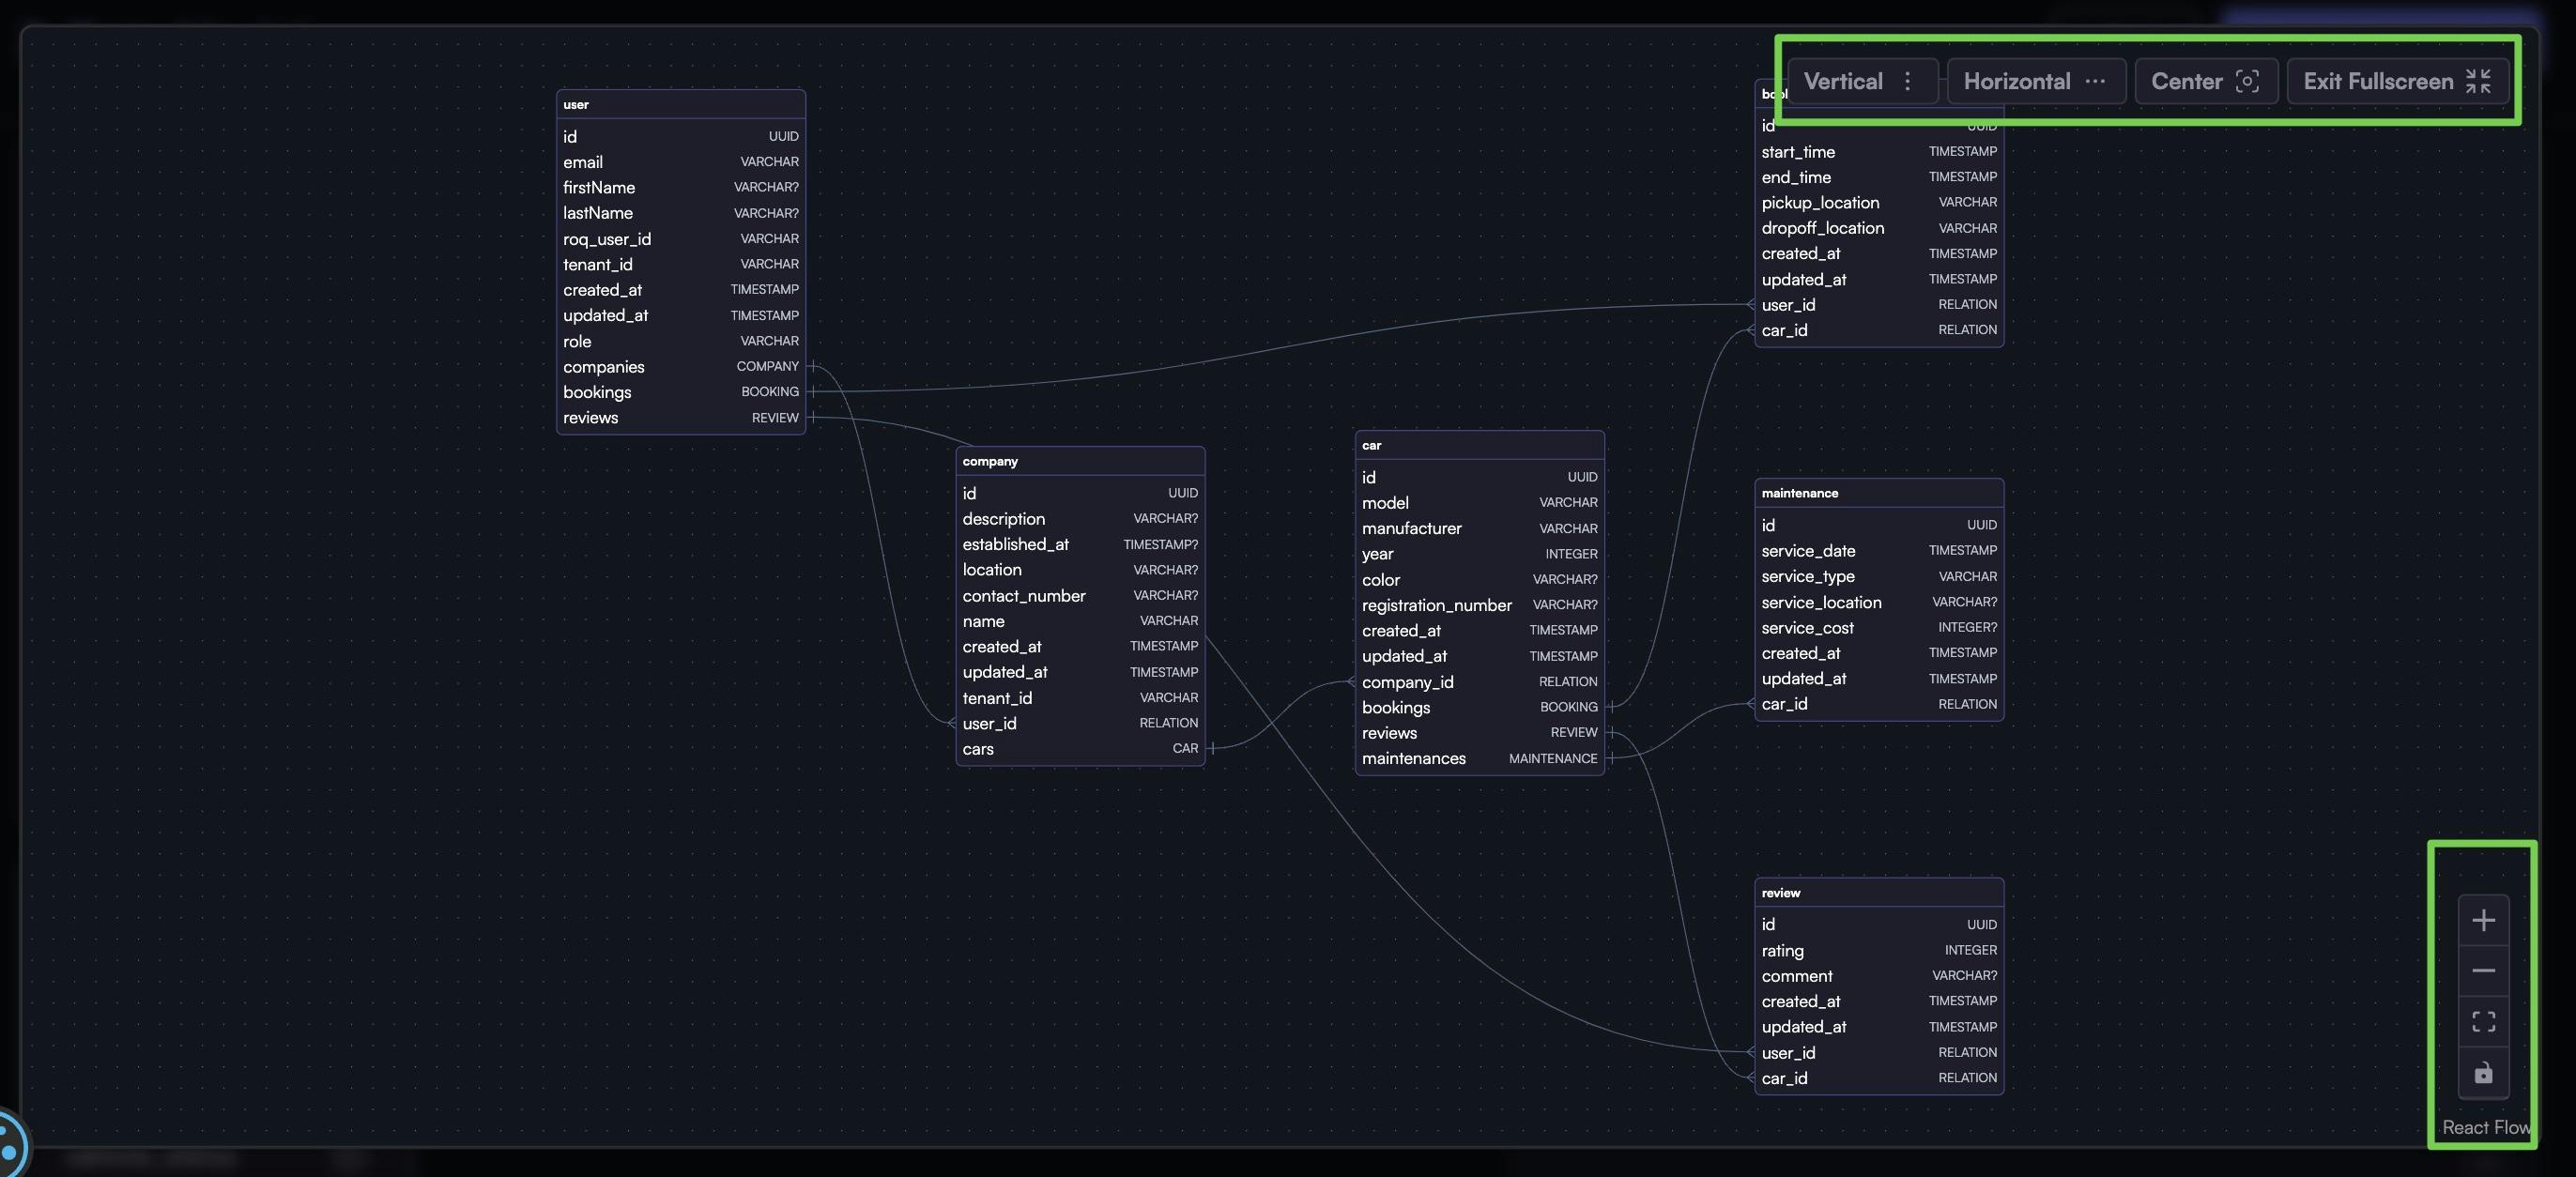
View schema visually
On the right side of the page, you'll find the schema visualization. Here, you can view the entire schema in fullscreen mode, align-items vertically or horizontally, center the content, zoom in or out, and lock the visualization.
Regenerate SDK
Whenever you modify the schema on the ROQ Console and publish, it is necessary to regenerate the SDK in your application development.