Overview
Login and logout
ROQ offers easy API to handle user authentication and authorization using generated SDK. This section will show you how to add a login and logout button. You can utilize the signIn and signOut methods from the roqBrowserClient factory that live in the src/lib/roq/roq-client.ts. To use it you must import it first:
import { roqBrowserClient } from "@/lib/roq/roq-client";Add login button
You can use the signIn() method to add a login button. For example, suppose we want to add a login button to the home page in Next.js:
import { roqBrowserClient } from "@/lib/roq/roq-client";

export default function Home() {
  return (
    <main className={`text-center flex flex-col items-center justify-between p-24`}>
        <h1 className='m-10'>Welcome</h1>
      <button
          onClick={() => roqBrowserClient.signIn()}
          className="bg-blue-500 hover:bg-blue-700 text-white font-bold py-2 px-4 rounded"
        >
          Login
        </button>
    </main>
  )
}
You can use inline handling and if you want to redirect the page after the login process, you can use the postLoginRedirect option.
For example, suppose we want to log in with the type owner and we want to redirect the page to the user page when it's authenticated:
import { roqBrowserClient } from "@/lib/roq/roq-client";

export default function Home() {

  const handleSignIn = () => {
      roqBrowserClient.signIn('owner', { postLoginRedirect: '/user' })
  }

  return (
    <main className={`text-center flex flex-col items-center justify-between p-24`}>
        <h1 className='m-10'>Welcome</h1>
      <button
          onClick={handleSignIn}
          className="bg-blue-500 hover:bg-blue-700 text-white font-bold py-2 px-4 rounded"
        >
          Login
        </button>
    </main>
  )
}
You can customize the postLoginRedirect option value to redirect the route to any page after the successful login.
Please note that the login process will take the user to the ROQ login form. You can customize the login form through ROQ Console.
Add logout button
To add a logout button is pretty simple. We can add a link or HTML button tag to call the signOut method from the generated SDK.
import { roqBrowserClient } from "@/lib/roq/roq-client";
import { useRoqPlatformUserProfiles } from "@/lib/roq";

function User() {
  const { data } = useRoqPlatformUserProfiles()

  return (
    <div className='m-5'>
        <h1 className='m-10'>Welcome</h1>
        <p className='my-10'>Logged in as: <strong>{data?.userProfiles.data[0].email}</strong></p>
        <br />
        <button
          onClick={() => roqBrowserClient.signOut()}
          className="bg-blue-500 hover:bg-blue-700 text-white font-bold py-2 px-4 rounded"
        >
          Logout
        </button>
    </div>
  )
}
The useRoqPlatformUserProfiles() is a hook to get the user's profile data. It supports filtering, sorting, and searching for specific user profile data.
Handling session
ROQ's login and session management is based on the OAuth protocol (opens in a new tab). Here is how it works:
- The user clicks the Login button or is redirected to a login page provided by ROQ.
- ROQ prompts the user to log in using username and password or social sign-ins (e.g., Google) and then sends a special token back indicating that the user has granted permission to access your web application.
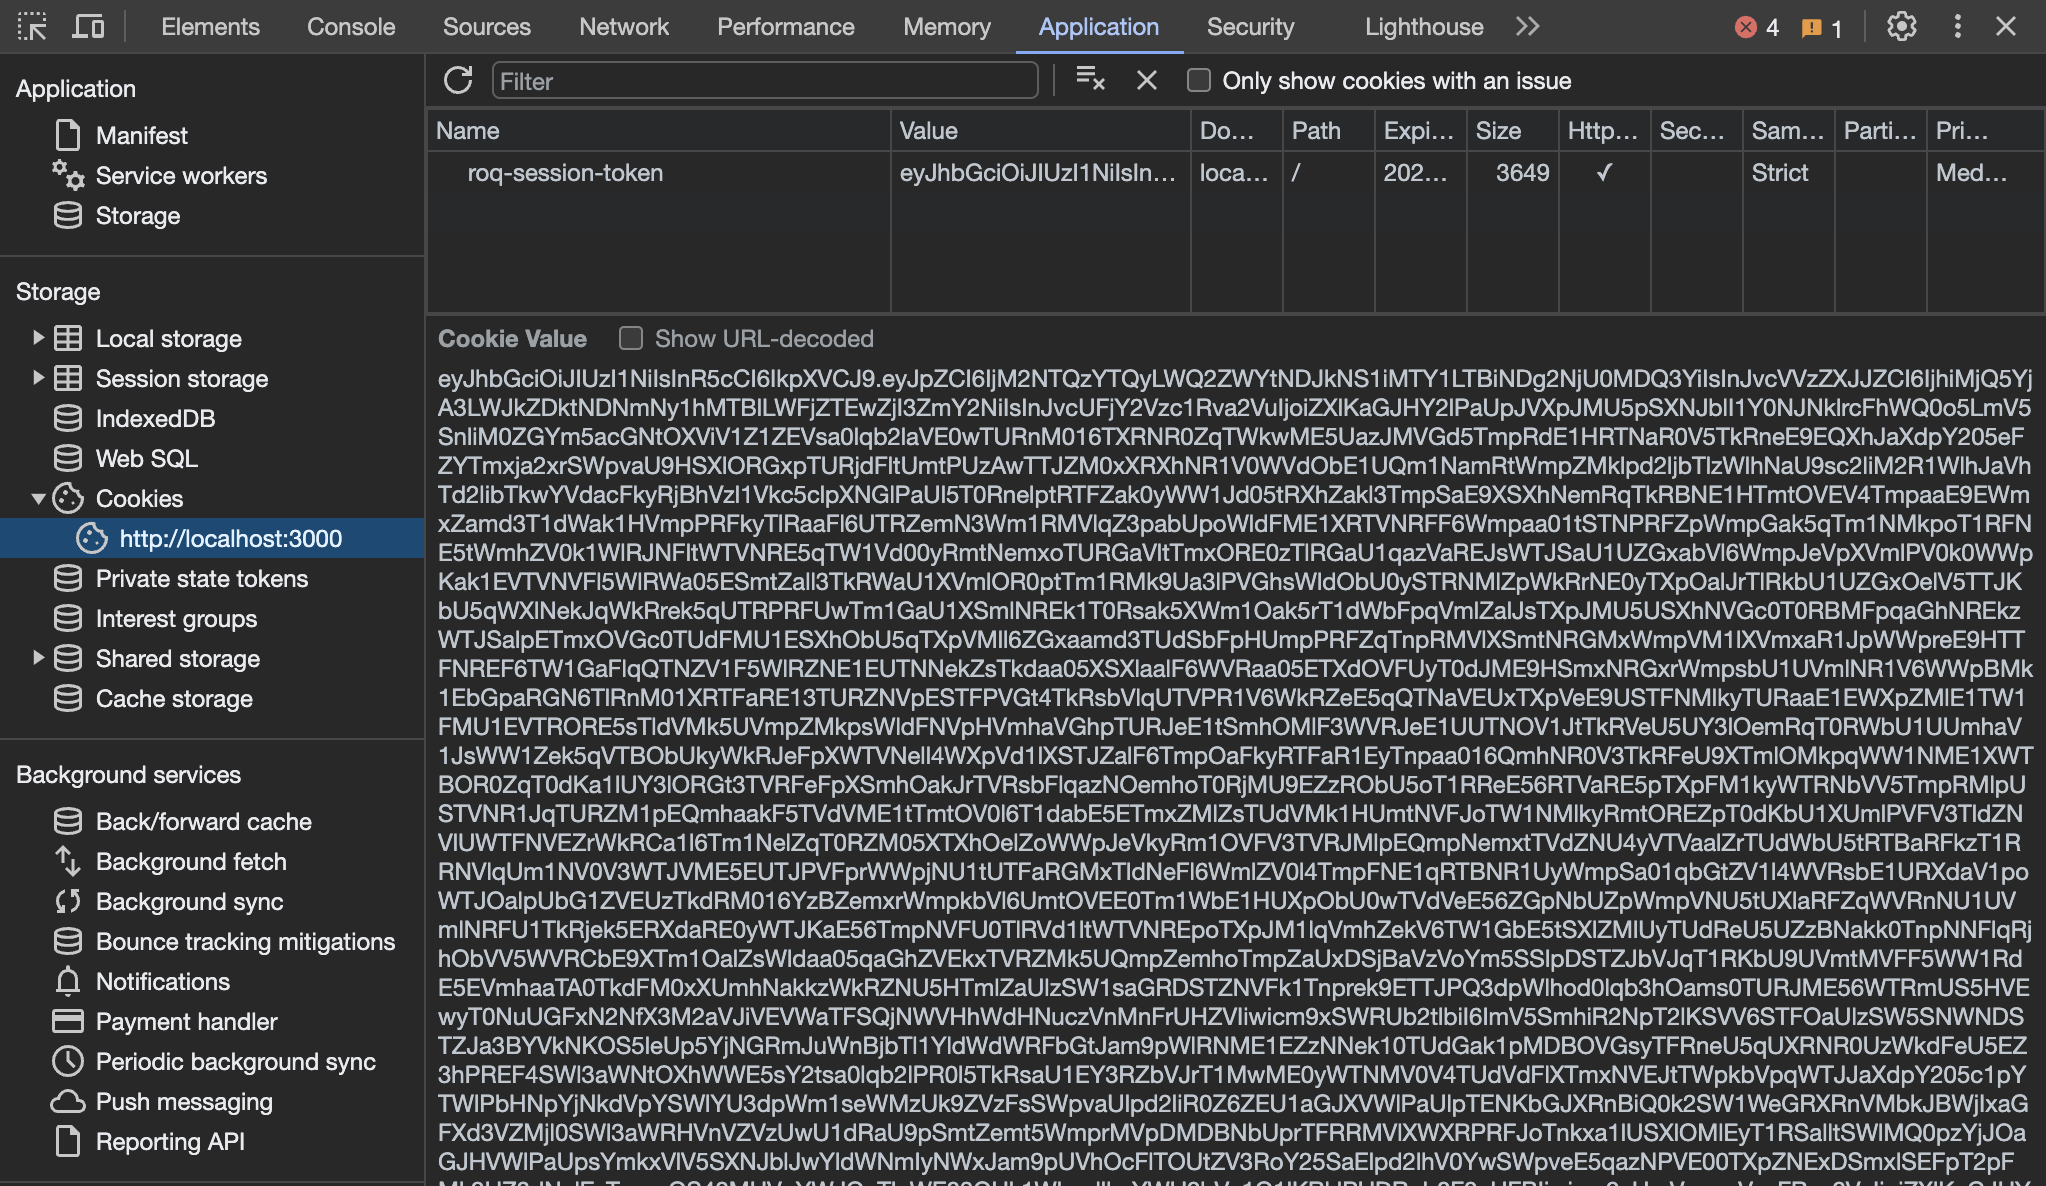
The roq-session-token is created whenever a user is authenticated. This is a session ID that allows you to maintain a continuous interaction with the ROQ BaaS. The token is stored in a cookie, and later, it will be used in the Authorization header in every HTTP request via roqBrowserClient (generated SDK).
To use session data in the Next.js application, we can use the useSession() method and then use the session data.
import { useSession } from '@/lib/roq/roq-hooks';

function Book() {
  const { session, status } = useSession()

  return (
    <div className='m-5'>
      {session ? (<>
        <p className='my-10'>Logged in as: <strong>{session?.user.email}</strong></p>
      </>) : 'Not logged in'}
    </div>
  )
}
Get user's email, role and tenant
The session object contains the current user's email, roles, and tenant. We can use this data to customize the page based on the user's roles or tenants.
import { useSession } from '@/lib/roq/roq-hooks';

const { session } = useSession()
The session object contains the following data:
{
    "id": "721cb0f4-5804-44aa-8bb6-a350126f59e3",
    "roqAccessToken": "eyJhbGciOiJIUzI1NiIsInR5cCI6IkpXVCJ9.eyJyb3FFbnZpcm9ubWVudElkIjoiZTM0MDg3MzMtMGFjMi00NTk2LTgyNjQtMGE3ZGEyNDgxODAxIiwicm9xVXNlcklkIjoiOGIyNDliMDctYmRkOS00M2Y3LWExMGUtYWNlMTBmMjdmZjY2Iiwicm9sZXMiOlsib3duZXIiXSwibm90aWZpY2F0aW9uVG9rZW4iOi",
    "roqUserId": "8b249b07-bdd9-43f7-a10e-ace10f27ff66",
    "user": {
        "firstName": "Francis",
        "lastName": "Bergnaum",
        "email": "francis84@gmail.com",
        "timezone": "Asia/Jakarta",
        "locale": "en-US",
        "roles": [
            "owner"
        ],
        "tenantId": "dc92f95d-42bd-45af-84a7-da227d694cbb"
    },
    "iat": 1698981898,
    "exp": 1785381906
}
From the session object, we can access the user's email, roles, and tenant:
import { useSession } from '@/lib/roq/roq-hooks';

const { session } = useSession()

const userId = session?.roqUserId
const email = session?.user.email
const roles = session?.user.roles
const tenantId = session?.user.tenantId